

Saturday, November 5, 2011


Friday, November 4, 2011
Cards that Care

If you've never been on a blog hop before, it starts with a post that tells you about the hop and gives you a link to the next stop. Sometimes you are visiting someone's blog and find out the are a participant in a blog hop. You become intrigued and want to follow the hop from the start, so they also have a link to where you can start from the beginning. Be sure to leave a comment to let them know you stopped by. Sometimes they have a drawing from all the comments for a prize. One way to explain a blog hop is that it's like a blog tour. Sort of like a tour of homes that is so popular during the Holidays. Usually you're seeing blogs you have never seen before (at least one or two) and many times they are supporting a good cause.
The Cards that Care hop has many blog stops and each will be posting a handmade Christmas card. It's a good way to see a wide variety of cards and techniques. I am looking forward to spending my spare time this weekend visiting the many sites, working on Christmas Cards for the drive and working. Yes, I am working every day this weekend, but I don't want to miss this. If you want to go on the blog hop start here.
Thursday, November 3, 2011
Hero Arts
 |
| Silver and Gold |
They also have bi-monthly contests. There are 3 categories you can enter each month. Just create a card using at least one Hero Arts stamp and upload it to Flicker. Add it to the Hero Arts group with the designated tag for that contest. It's that simple.
The categories for November are: (1) Holiday Tags and Gift Wrap, (2) Bling It Up! and (3) Color Challenge - Pink, Pool, Green, Neutral and White. Entries are due November 10th for the first round and November 27 for the second round.
When I saw the Bling It Up! category I started thinking about my favorite Christmas show when I was growing up. "Rudolph the Red Nosed Reindeer". The forest animals decorate the trees with silver and gold and those decorations "bling" as the snowman sings "Silver and Gold". I still love listening to Burl Ives sing "Silver and Gold".
It sounds like a fun category and I'm sure there will be plenty of entries. I tried my hand at it and this is what I came up with. Silver and Gold with lots of bling. I've used silver and gold embossing powder on silver and gold shimmer paper and of course added 2 different size gem stones for the holly berries and Christmas decorations on the tree, with a larger gemstone for the star on top. I also used a gold leaf pen to fill in the open leaves on the tree. All the stamps are Hero Arts cling stamps from seasons past . Very Blingy!
Wednesday, November 2, 2011
GUESS WHAT?!
Yes! Have you checked out Tim Holtz's blog today? Great announcement and video and of course a chance to win the newest seasonal color set. Seasonal Distress Ink Winter 2011. I don't want to give away all the details so click here, watch and learn and then leave a comment on Tim's Blog for a chance to win! But don't wait too long. Winners will be announced Friday 11/4.
Tuesday, November 1, 2011
Blogging Writes
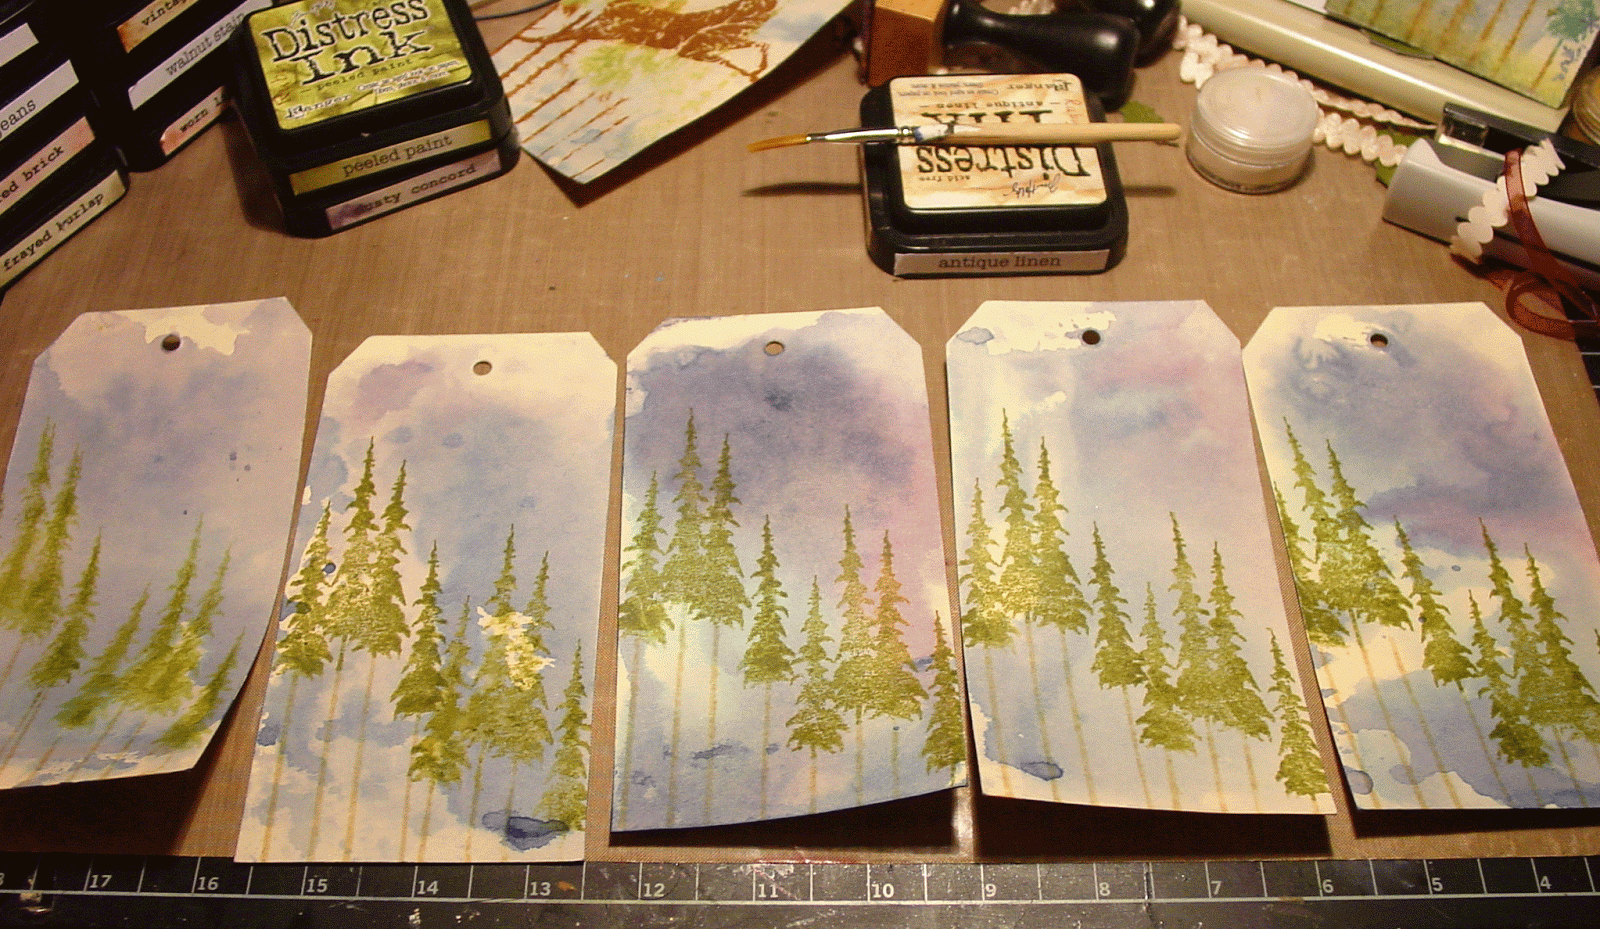
I enjoyed the technique from Linda's Grungy Monday 24 Challenge last week but was a little impatient allowing enough time to make sure every thing was completely dry before stamping and adding the Perfect Pearls. If the background is not completely dry the Perfect Pearls will stick to the background too. See Tim's video here. Another problem I ran into was exactly how much to mist with water to get the ink under the pearls to wick but not misting so much that the pearls started to float on the water loosing the definition of the stamped image. So my picture today is of some additional backgrounds I inked for making additional tags. These backgrounds are a little darker so I may add a Snowman instead of a Reindeer.
Linda's Grungy Monday 25 is challenge this week is "Use your favorite Tim Holtz products to create a loving tribute to a friend, relative or inspiring person who's passed away." That would be my Mom and Dad. Linda's challenges are all based on the Tim Holtz techniques. I love checking out what everyone does. It's sorta like an unofficial blog hop. Only 2 post so far.
I also wanted to share that Tim Holtz is releasing the new Distress Inks Seasonal Series Winter 2011. These colors are so wintery it makes me start looking for snow.
I've added a new blinkie to my side bar for NaBloPoMo. BlogHer is a new blog I've found. Yes, It is about blogging. They are have designated November as National Blog Post Month .The idea is to blog every day this month. They will also have a new suggestion each day if you need ideas on what to blog about. Since I have decided to try to post more often, I thought this would be a good challenge for me so this is day one and I am posting. The thing is I usually blog about my art projects. I'm not saying I will create something new every day but I do think I will be spending more time creating in my studio which I wanted to do anyway. of course Jennifer Mcguire is having the Cards that Care card drive. So.... a new blog post every day. Quite a challenge. So good luck to me.
Friday, October 28, 2011
Grungy Monday at Studio L3

Here's a quick run through of how I made my tag. The background has Broken China, Faded Jeans and Chipped Sapphire with just a touch of Dusty Concord. I inked up the pine tree stamp from the Reindeer Flight stamp set with shabby shutters and antique linen and spritzed the stamp with water before stamping to get a water color effect. I tried to keep the colors light so the reindeer would show up better. Once th tag was dry, I stamped the reindeer in rusty hinge and then used Perfect Bronze. After heat setting spritzed a little water and then heat set. Then I inked the snowflakes from Min Holidays CMS066 with distress embossing and applied Perfect Pearl. I only lightly misted the snowflake with water. Next I did just a little blending around the edges in spots with Broken China, Peeled Paint, Antique Linen and a little Walnut Stain. I also used a little Meadow alcohol ink with White mixative on the Believe metal tag, and a December calendar from the roll of tissue tape and a little ribbon. Love that tiny attacher which i used to attach the ribbon. I really enjoyed this technique and since all the supplies are out think I'll play a little more. Thanks for stopping by.
Thursday, October 27, 2011
Collector's Edition
 OK. I know we all say it when something "New" comes in at our local scrap/stamp/craft store. We look at it. Maybe drool and then say "I have so much stuff at home I haven't even used yet" and then we buy it anyway. Well this story is the same . . . but different.
I work part time at Archiver's. We recently had an employee contest at the store. The rules were simple. Design a Christmas card. Use our own tools and supplies. Make the cards on our own time. Only use items that were currently sold at the store.
Now I'm a big Tim Holtz fan and love to use his products so of course I decided to make a card using Tim Holtz products and techniques. I already had a huge collection of products to choose from at home. I didn't really need to buy anything to make a card. But I did want to have some new "Must Haves" to make my card. I already had the "Tag and Bookplates" die. I had bought it when it first came out. I figured if I had the "Mini Reindeer & 25" Movers and Shapers die I could make a really fun card. My purchase made, I set off for home. I ended up going back the next day and buying a few more items: a pack of gold metals from Mark Richards, a sheet of velum and a pack of Red A7 pre-scored cards for the base. I really didn't spend that much. OK, I had recently bought the Tim Holtz Christmas Kraft Stash. But we can't count that. It was already part of my collection.

I wasn't scheduled to work today but went into the store to scrap with some of my friends. When I got there, I found out I didn't win. No one from my store did. Of course I was disappointed but I was ok. I had so much fun working on my card and felt the ladies that did win must have loved making their cards too. I am making multiples to mail out and had an extra one so I asked my manager if she wanted one of my cards for the store to display and she said yes. Then she asked me if I had made a copy of my supply list. We list the products inside the cards in case the customers want to know how we made them. I hadn't thought to make a copy but she said she could make one up. I told her the colors of inks I used and went over the card supplies quickly. I went off to the workroom to scrap with my friends.
A little later, she showed me the hold ticket where she had scanned the items for the product code. Of course when she scanned them it also gave her the price of each item along with the total. She asked me if I knew how much my card would cost to make. When I said no, she and the other ladies had a grand time teasing me about my $179.89 card. Then they said that of course, it did not include the price of a die cut machine.
Subscribe to:
Posts (Atom)
