Showing posts with label Grungy Monday. Show all posts

Tuesday, February 7, 2012

Grungy Monday 35

Linda Ledbetter's  Grungy Monday 35 challenge this week is to create a Holtz-ian ATC card. I had a lot of fun and created 2 ATCs. I started with Tim's Vintage Shabby Paper Stash. Tim's paper stash pads have a page with the various pattern papers reduced to ATC size. Once I quickly trimmed out the ATC cards I then moved on to some of Tim's Texture Trades embossing folders. I selected the Wing for one card and the Umbrella Man for the other. These smaller embossing folders are the perfect size for ATCs.

I blended some distress inks onto the cards and then added Rock Candy Distress Crackle Paint. I first heard about this technique when Tim posted about it on his blog. He directed us all to Tammy Tutterow's blog and of course I loved what she did. She calls it Frosty De-boss and has a great tutorial here.

Another favorite of mine is Tim's Vintage Lace Alterations die. I used it to diecut lace from the pink Vintage Shabby paper. I painted  2 different lace patterns with Brushed Pewter Distress Crackle Paint. It gave it a nice finely crackled shimmer.

The pink and blue cogs were die cut from grungeboard using movers and shapers dies and then painted with Picket Fence Distress Crackle Paint and inked with Worn Lipstick and Faded Jeans Distress Ink. I used Jet Black Archival Ink for stamping, it works great on the Rock Candy Distress Ink. Then I added the Idea-ology elements for embellishments.

I also used the Frosty De-boss technique for my second ATC. I blended Dusty Concord Distress Ink at the top and Shabby Shutters at the bottom. The middle blue is from the Vintage Shabby Paper. "RAIN" is die cut from Chip Block Alterations, inked with Chipped Sapphire, water splashed, heat set and then covered with glossy accents.  The letters for "Singing in the" are from my stash. I glued the letters to printer paper and punched them out with a basic hole punch. You may recognize the music notes from the Stampers Anonymous Feative Sounds DMS 048 stamp set. It's the one with the lamp post. Tim shared a "ghost stamp" technique with us during the 12 Tags of Christmas 2011. I used the idea and rolled the stamp on the ink pad so I had just enough ink for the area I wanted to stamp.

I really like the glossy shine on my ATCs. You can't really see it in my pictures, but I wanted to capture the color. Rock Candy Distress Crackle Paint is a wonderful product. My little jar has lasted a long time and adorn many projects, but it is almost empty now. It is definitely on my shopping list for next time I buy supplies.

Monday, February 6, 2012

Distress Ink Storage

front and back view of my distress ink case.

I started working on a project for Linda Ledbetter's Studio L3 Grungy Monday 34 challenge but didn't get it finished in time for the challenge deadline. It is still a work in progress but here it is so far.

Drawer with foam pads                          Handle
I had made a small storage box for my distress inks but I outgrew it. This is my new storage case. I made it from chipboard and covered it with paper from Tim Holtz's Vintage Shabby paper stash. I've used crackle distress paint (see Tim's video here), distress inks, grungeboard for flowers and flourishes, fragments, acetate with alcohol inks, stampers anonymous stamps, tissue paper, glassine, idea-ology, an embossing folder and Alterations die cuts. While the challenge was to use the Distress Crackle Paint after watching Tim's video, I wanted to decorate my case using much more of my favorite Tim Holtz products and techniques so it would be a reminder of all the different techniques I have learned from Tim's blog over the years. My reminder to be curious and try new things.

The drawer holds a foam pad for each of my Distress Inks. The shelves have a felt strip to help hold the inks snuggly  in place. I made a handle using Tim's ball chain and grungeboard to make it is easy to take with me when I go crop. The case is not a deep as the ink pads. I designed it so the pads stick out about 3/4" which makes it easy to grip the ink pads to slide them out of the case.

I don't have all the colors available in the pads but I also have quite a few of the Distress Stains. Between the two I do have a pretty good selection. I love my Tim Holtz Distress Inks!

Saturday, November 26, 2011

I Love Grungy Monday 28

Alcohol Inks and Embossed Foil
Grungy Monday 28 at Studio L3 is a wonderful challenge to use Alcohol Inks and Foil Embossing using Tim Holtz fantastic Fall Pumpkin as inspiration. You can find Tim's Pumpkin here on his blog. He has a wonderful tutorial telling you exactly how he created his pumpkin. You can find Linda Ledbetter's beautiful Tim inspired milk carton gift box and the challenge for this week here.

You may recognize my butterfly from earlier in the week when I created it and posted it on my blog. I made my butterfly by covering  one of Tim's grungeboard butterflies with the foil and running it through my Big Shot with the Regal Flourishes embossing folder. Then I dripped on alcohol inks letting them dry between colors and although you can't see it here direct to foil Archival jet black ink on the raised areas. It really accents the alcohol inks. The body of the butterfly is a stick pen from Making Memories also covered in alcohol ink and the wings are connected with wire and tiny attacher staples. One thing you couldn't see before are the butterfly's antennae. They are light weight wire that is wrapped tightly around the wire ring at the top of the stick pin with the ends sticking out on each end to form the antennae. The light blue flower behind them helps to show them off.

Today I finished my project by covering the frame with the Inkssentials adhesive foil and embossing it with the Damask embossing folder from the same set. I already had this Chipboard Frame from a Making Memories kit. I used the alcohol inks and Archival Jet Black Ink per Tim's instructions.

The flowers are Grungeboard die cut from Tim's Tattered Floral Die. I used Rock Candy Distress Stickles and Distress Stains with a technique I learned from Tim when he was guest instructor in Jennifer McGuire's Inspiration Showcase class. The stickpin butterfly is pushed through the foam dots used to layer the flower with the big pearl.

The picture in the frame is one of my favorites of a trip I took with my daughter Valerie to the Chattanooga Aquarium in 2007. They have a wonderful Aquarium and a beautiful Butterfly Garden. I will always think of their Butterfly Garden when I think of Chattanooga.

Thanks for stopping by and taking a look. Be sure to leave a comment if you have time. Now I'm going to go and check out the other entries posted on Linda's blog. So far there are 23, but the challenge is open until tomorrow, Sunday November 27th at 8pm MDT. I really enjoy Linda's Grungy Mondays Challenge.

Saturday, November 19, 2011

Perfect Pearl Mini Misters - Grungy Monday 27

Linda at Studio L3 picked out quite a challenge for us this week. We have the opportunity to make our own Perfect Pearl Mists and play. Using distress reinkers and a technique Tim Holtz shares with us at the Twelve Tags 2007~Day 6 . I love this technique, but I really need a lot more practice. If you want to see Linda's lovely scene complete with deer along with the other works submitted for this challenge, check out her blog at Studio L3: Grungy Monday 27 

You can also see how Tim Holtz makes the Perfect Pearl Distress Ink mist here along with his 2008 March technique challenge tag.

My mist combinations are:
Walnut Stain and Perfect Cooper
Broken China and Perfect Pearl
Shabby Shutters and Perfect Gold

I wish you could see the shimmer but it is hard to capture on camera. You'll either have to take my word for it or mix up your own batch and try it for yourself.

Thanks for stopping by.


Tuesday, November 8, 2011

A Challenge! Too Much Fun! Grungy Monday 26

Santa's Wishing You A Merry Christmas

Yes! I have completed my Tag for Studio L3 Grungy Monday 26 challenge for this week. I was very excited when I saw Linda had selected one of Tim Holtz's 12 Tags of Christmas for the challenge. We didn't have to make a Christmas Tag. Just create a project using the techniques of that post. But I love Christmas so I pulled out my Christmas stamps and got started. Here is my tag.

The materials used for this Tag were: Tim Holtz Idea-ology clear mask; Picket Fence Paint Dabber; Peeled Paint, Antique Linen, Iced Spruce, Evergreen Bough, Festive Berries Distress Inks; Archival Jet Black Ink; Gold Embossing Powder; Peeled Paint Distress Stickles; Candy Cane Stickles; a little strip of German Paper and miscellaneous ribbon. My "Santa" and "Merry Christmas" stamps are from the "Santa's Wish CMS 032" set and the "Long Tall Pine Trees" behind Santa's head are from the "Reindeer Flight CMS 052" stamp set. Both from Stamper's Anonymous Tim Holtz Collection.

If you want to check out the inspiration for my tag check out Tim's tag from Day 7 of  The Twelve Tags of Christmas 2009 click here. Tim explains all the techniques and has pictures detailing each step. I cut more pieces for my mask since the stamp I used has more details and used different colors (The Winter Seasonal Inks are new) but otherwise I pretty much just followed his instructions for the techniques.

You still have time to create a project for Grungy Monday. To get the details go to Linda's blog by clicking here. While you're there check out her wonderful tag and all the other projects that the other talented artist are posting. The challenge ends this Sunday, November 13, 80pm MDT.


One last thing. I was visiting Tim's blog today and He was really excited to share a link to Tammy Tutterow's blog. So of course I had to check it out. Tammy has Tuesday Tutorials and shared a really cool technique using Rock Candy Distress Crackle Paint and Dry Embossing. I took a look and I think it Rocks! She calls it Frosty De-boss. Check it out here.

Monday, November 7, 2011

Grundy Monday 25

Roy and Betty Albea
Linda's Grungy Monday 25 Challenge last week made me think. The challenge:  "Use your favorite Tim Holtz products to create a loving tribute to a friend, relative or inspiring person who's passed away." I thought all week long about my parents. I miss them so much because I love them so much. I thought about their life, how much they loved each other and how much they loved their children, grandchildren and yes even great-grandchildren.

detail of film strip ribbon
I also thought a lot about the page I wanted to make for them. I thought about the photos I would use and while I worked on other things I thought about what products I would use. I thought about it so much I didn't finish in time. I finally finished it up this morning. It was a joy to work on this challenge. I find that working on a memorial page to someone that has been taken away brings them closer to me and instead of dwelling on my loss, I can remember the wonderful times I had with them.

Once the crackle dries use distress inks
Here is a list of Tim's products I used: Grungepaper and Grungeboard. Picket Fence, Fired Brick and Worn Lipstick Crackle Paint. Idea-ology Filmstrip Ribbon. Tim Holtz Sizzix Alterations Die Heart Wings. Distress Inks Iced Spruce (from the winter seasonal distress ink set) on the wings. Also used Worn Lipstick, Vintage Photo, Walnut Stain and Antique Linen Distress Inks and the Flourish mask on the background. Rock Candy Distress Stickles. Glossy Accents.All paper except the velum is the Valentine theme paper from Tim's Seasonal Paper pack.The little bits of pink ribbon is from my stash.

I love Tim Holtz's products. I also love to watch him demo them. To see Tim's Videos on Crackle Paint, Distress Inks and more click here. To visit his blog click here.

I hope you visit Linda's Grungy Monday 25 Challenge and see some of the wonderful tributes the other ladies did. They are beautiful. While you're there, check out her current challenge. This week, Grungy Monday 26, the challenge is to used techniques from a tag Linda selected from one of Tim's 12 Tags of Christmas. I love Tim's 12 Tags and would love to tell you all about it but I'm saving that for another post. I've got to get busy. I'm not going to miss this week's challenge. It is going to be too much fun!

Tuesday, November 1, 2011

Blogging Writes

Lots of things going on this month. On the art side  Linda has a new challenge and Tim's got new colors. On the blogging side my daughter shared with me that this is NaBloPoMo at BlogHer. And of course Of course this is the month for Thanksgiving and Black Friday.

 I enjoyed the technique from Linda's Grungy Monday 24 Challenge last week but was a little impatient allowing enough time to make sure every thing was completely dry before stamping and adding the Perfect Pearls. If the background is not completely dry the Perfect Pearls will stick to the background too. See Tim's video here. Another problem I ran into was exactly how much to mist with water to get the ink under the pearls to wick but not misting so much that the pearls started to float on the water loosing the definition of the stamped image. So my picture today is of some additional backgrounds I inked for making additional tags. These backgrounds are a little darker so I may add a Snowman instead of a Reindeer.

Linda's Grungy Monday 25 is challenge this week is "Use your favorite Tim Holtz products to create a loving tribute to a friend, relative or inspiring person who's passed away."  That would be my Mom and Dad. Linda's challenges are all based on the  Tim Holtz techniques. I love checking out what everyone does. It's sorta like an unofficial blog hop. Only 2 post so far.

 I also wanted to share that Tim Holtz is releasing the new Distress Inks Seasonal Series Winter 2011. These colors are so wintery it makes me start looking for snow.

I've added a new blinkie to my side bar for NaBloPoMo. BlogHer is a new blog I've found. Yes, It is about blogging. They are have designated November as National Blog Post Month .The idea is to blog every day this month. They will also have a new suggestion each day if you need ideas on what to blog about. Since I have decided to try to post more often, I thought this would be a good challenge for me so this is day one and I am posting.  The thing is I usually blog about my art projects. I'm not saying I will create something new every day but I do think I will be spending more time creating in my studio which I wanted to do anyway. of course Jennifer Mcguire is having the Cards that Care card drive. So.... a new blog post every day. Quite a challenge. So good luck to me.


Friday, October 28, 2011

Grungy Monday at Studio L3

This week's Grungy Monday Challenge at Linda Ledbetter's Studio L 3 blog  is using Tim Holtz Perfect Distress Technique. There are already 32 entries posted, if you want to see them click here and it will take you straight to Linda's Grungy Monday 24 post. I enjoy seeing what everyone is working on. There are so many different ways you can use this technique.

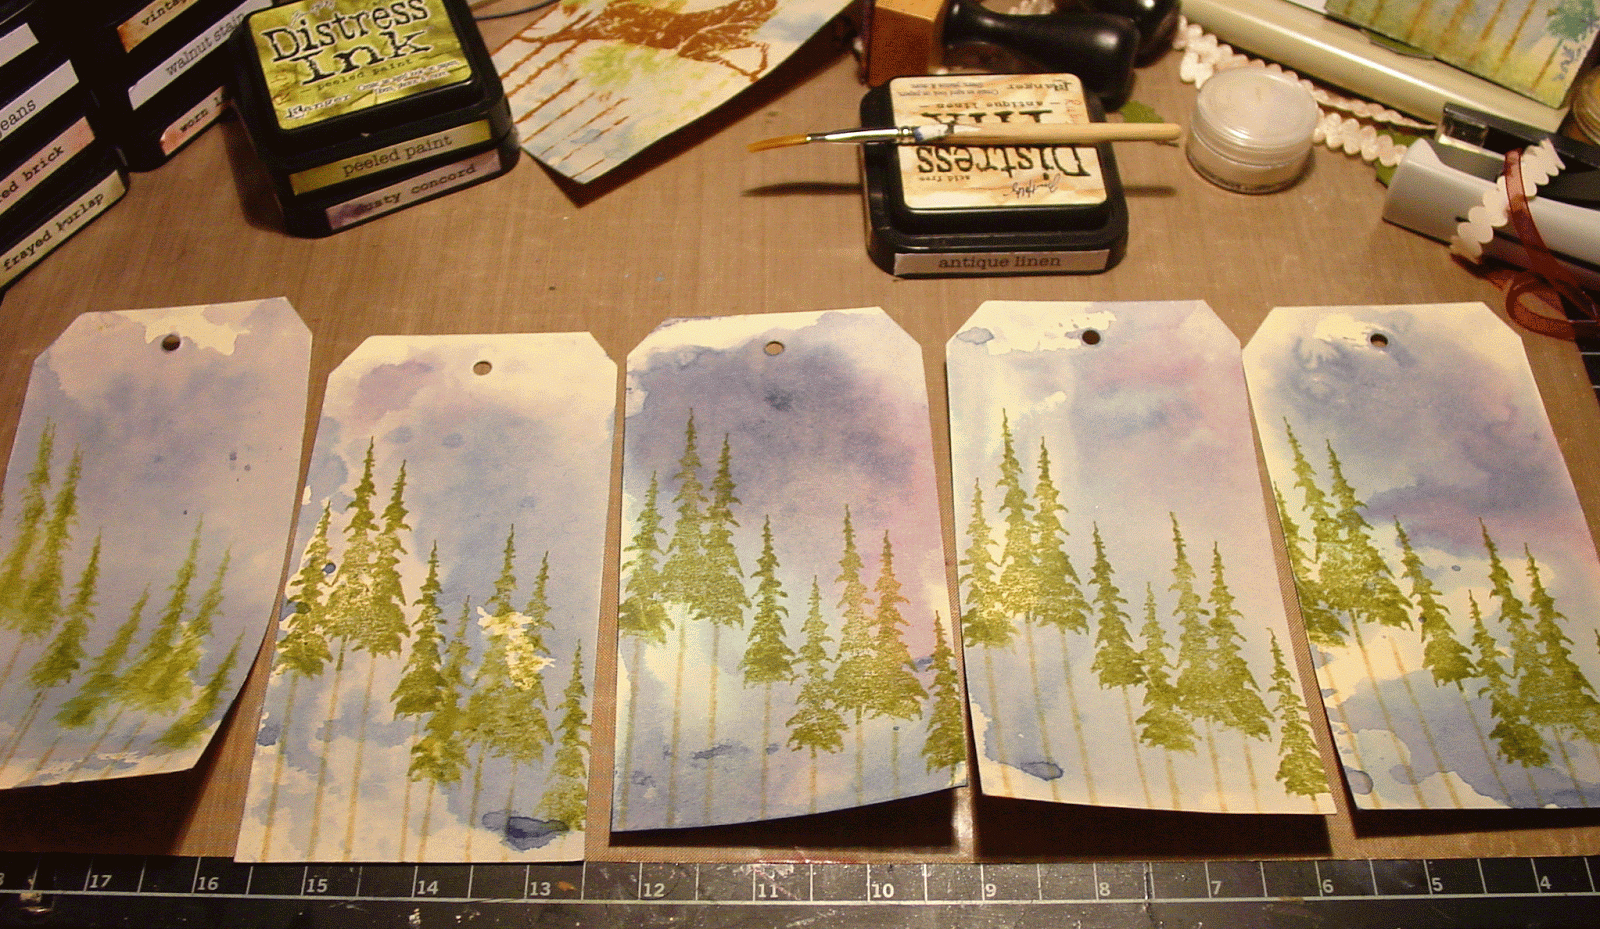
Here's a quick run through of how I made my tag. The background has Broken China, Faded Jeans and Chipped Sapphire with just a touch of Dusty Concord. I inked up the pine tree stamp from the Reindeer Flight stamp set with shabby shutters and antique linen and spritzed the stamp with water before stamping to get a water color effect. I tried to keep the colors light so the reindeer would show up better. Once th tag was dry, I stamped the reindeer in rusty hinge and then used Perfect Bronze. After heat setting spritzed a little water and then heat set.  Then I inked the snowflakes from Min Holidays CMS066 with distress embossing and applied Perfect Pearl. I only lightly misted the snowflake with water. Next I did just a little blending around the edges in spots with Broken China, Peeled Paint, Antique Linen and a little Walnut Stain. I also used a little Meadow alcohol ink with White mixative on the Believe metal tag, and a December calendar from the roll of tissue tape and a little ribbon. Love that tiny attacher which i used to attach the ribbon. I really enjoyed this technique and since all the supplies are out think I'll play a little more. Thanks for stopping by.

Monday, October 17, 2011

Tim in 10 Challenge

Happy Halloween Tag Card, close up of inside showing spider webs stamped in VersaMark and inside of card with greeting embossed with white embossing powder.
Linda Ledbetter has a "Grungy Monday" challenge at Studio 3 L  "Celebrating the Techniques and Products of Tim Holtz!"  Linda is an amazing artist and always post a project with each challenge she post on Monday. You can see some of her past Grundy Monday projects here.

I have been following Linda's blog and admiring her work and all the entries to her challenges but this is the first time I've actually created an entry by the deadline. I like to think about my projects for a while, and play with them for a while and usually by the time I get serious the deadline to enter has passed. Not today! What has changed you might ask? The challenge itself. I was to finish the card in 10 minutes and use at least 1 Tim Holtz product. Now as anyone who knows me can attest, using any amount of Tim Holtz product would not be a challenge for me, but finishing any project in 10 minutes? Impossible for me? Usually but not today. I think Linda's timed challenge it made it easier. By limiting the actual time to put it together to 10 minutes, I really had to focus and it worked! I will admit it took me two tries. (My daughter insist my first card opened the wrong way.) But my having to start over I eliminated some steps and had time enough to add a few more details. I am very happy with the final project.

For my card I used a scrap piece of Halloween paper from Tim's Seasonal Paper Stash and cut it with the Tags & Bookplates Alterations Movers & Shapers dye to use for the base and since it is two sided also used it for the bookplate and small reinforcers (all from the same die so only one pass through the big shot. Stamp set used is Trick-or-treat CMS 050. I used VersaMark to stamp the spiderweb over the inside of card heat set to dry ink and then stamped Happy Halloween and Zing white embossing powder and heat set. Then applied Black Soot Stain to a small cat from Seasonal Grungeboard and quickly heat set to dry. After folding the tag to make a card I attached the bookplate to the cover and used small black Scrapbook Adhesives foam squares to attach small cat. Then I added the ribbon and the gem stones. I still had a few minutes left so I tore the edge of the tag and inked away with walnut ink. I must admit I used a foam pad that already had been used with black soot but just didn't have time to find the right one. Then I realized I had just enough time for 2 quick sprays of Perfect Pearls Mists heirloom gold, just on the cover. It doesn't really show in the photo but adds a nice splattered mist of gold since it was so quickly applied.

I love Tim Holtz's blog. I have learned so many techniques through the years since he first started his blog. I wake up early every morning the first 12 days of December for the 12 tags of Christmas. (Well actually 13 because he does have drawings for fabulous prizes the day after the final tag posting of the season.) and collect Tim Holtz products like they were going out of style, which they never will. You should check out his blog if you never have before. He has some pretty amazing Halloween tags posted today and his instructions are the best. The web address is http://www.timholtz.com/ .

Linda's Tim in 10 challenge was a lot of fun. Now that it is done, I can't wait to see what the next challenge will be.

Wednesday, September 7, 2011


I am a big Tim Holtz fan. I love his blog and his products. I recently won one of his new journals from his District Market line and I love it. (thanks tim and mario!) It has a fabric wrapped cover with gorgeous embossed metal corners. It is a spiral notebook and has kraft paper pages. I have great plans to decorate the cover and use it as a handy reference for techniques, ideas and my stash list. I also won 3 of his distress stains and plan on using them inside the journal. You'll probably see a picture of the decorated cover here soon.

Tim will also be one of the guest teachers in the Jennifer McGuire's Inspiration Showcase Class I signed up for yesterday. Of course I heard about it from Tim's blog. I have only taken one online class before but enjoyed it. Usually they are more than my budget can withstand but this one was very reasonably priced, and I have most of the supplies on hand. This class looks like it will be very interactive and fun. Jennifer is also a Hero Arts artist and has her own blog, Jennifer McGuire Ink, so you can check here out there. She does beautiful work. Registration is closed for the class now but Tim will be having a random drawing for 3 spots. Just just post a comment on his blog by Tuesday 9/6 at 12:00PM MST. He is in Holland teaching but when he gets back he'll have the drawing so Good Luck!

Speaking of Tim (again) I was checking out some other blogs and found that there is a weekly challenge called GrungyMondays that I think I may just have to start participating in. It is a Tim Holtz technique challenge that is on the Studio L3 blog. Being a big Tim Holtz fan I really enjoyed looking at all the challenge entries so far to see how other artist are using his techniques and products.  I'm adding the blinkie to the sidebar because it just looks so cool and if you're interested in the challenge you can find it easily. When I post my challenge project, I'll post it here too.

One other blog I found today was Creations By Christie She has a great video where she is making charms with Tim Holtz Fragments and his paper and I love the way she finishes off the backs of her charms. If you have thought about using the fragments to make charms, you'll probably want to check it out.
Related Posts Plugin for WordPress, Blogger...