Showing posts with label Compendium of Curiosities. Show all posts

Tuesday, June 23, 2015

Layering Stencil Fun for the Compendium of Curiosities 3 Challenge

I had such fun working on my entry for Challenge #31 at Linda Ledbetter's Compendium of Curiosity 3 Challenge. Layering Stencil: Paint Resist that I posted a couple of photos of my work in progress shots on Instagram. Did you see them? Here is the completed tag.


The background of my tag was created using the technique from page 47 of Tim Holtz's "A Compendium of Curiosities Volume III". I used Picket Fence and Mustard Seed Distress Paint and Spun Sugar, Worn Lipstick, Dusty Concord and Squeezed Lemonade Distress Ink along with the Harlequin and Flourish Stencil but as to how I did it you will need to check your own copy of the book. 
Rules for the challenge are here and loads of inspiration for the technique is here.
Sponsor of this challenge is Inspiration Emporium.  They are generously donated a $50 gift certificate that some lucky winner can use to purchase some more goodies. If you want to check them out click here.
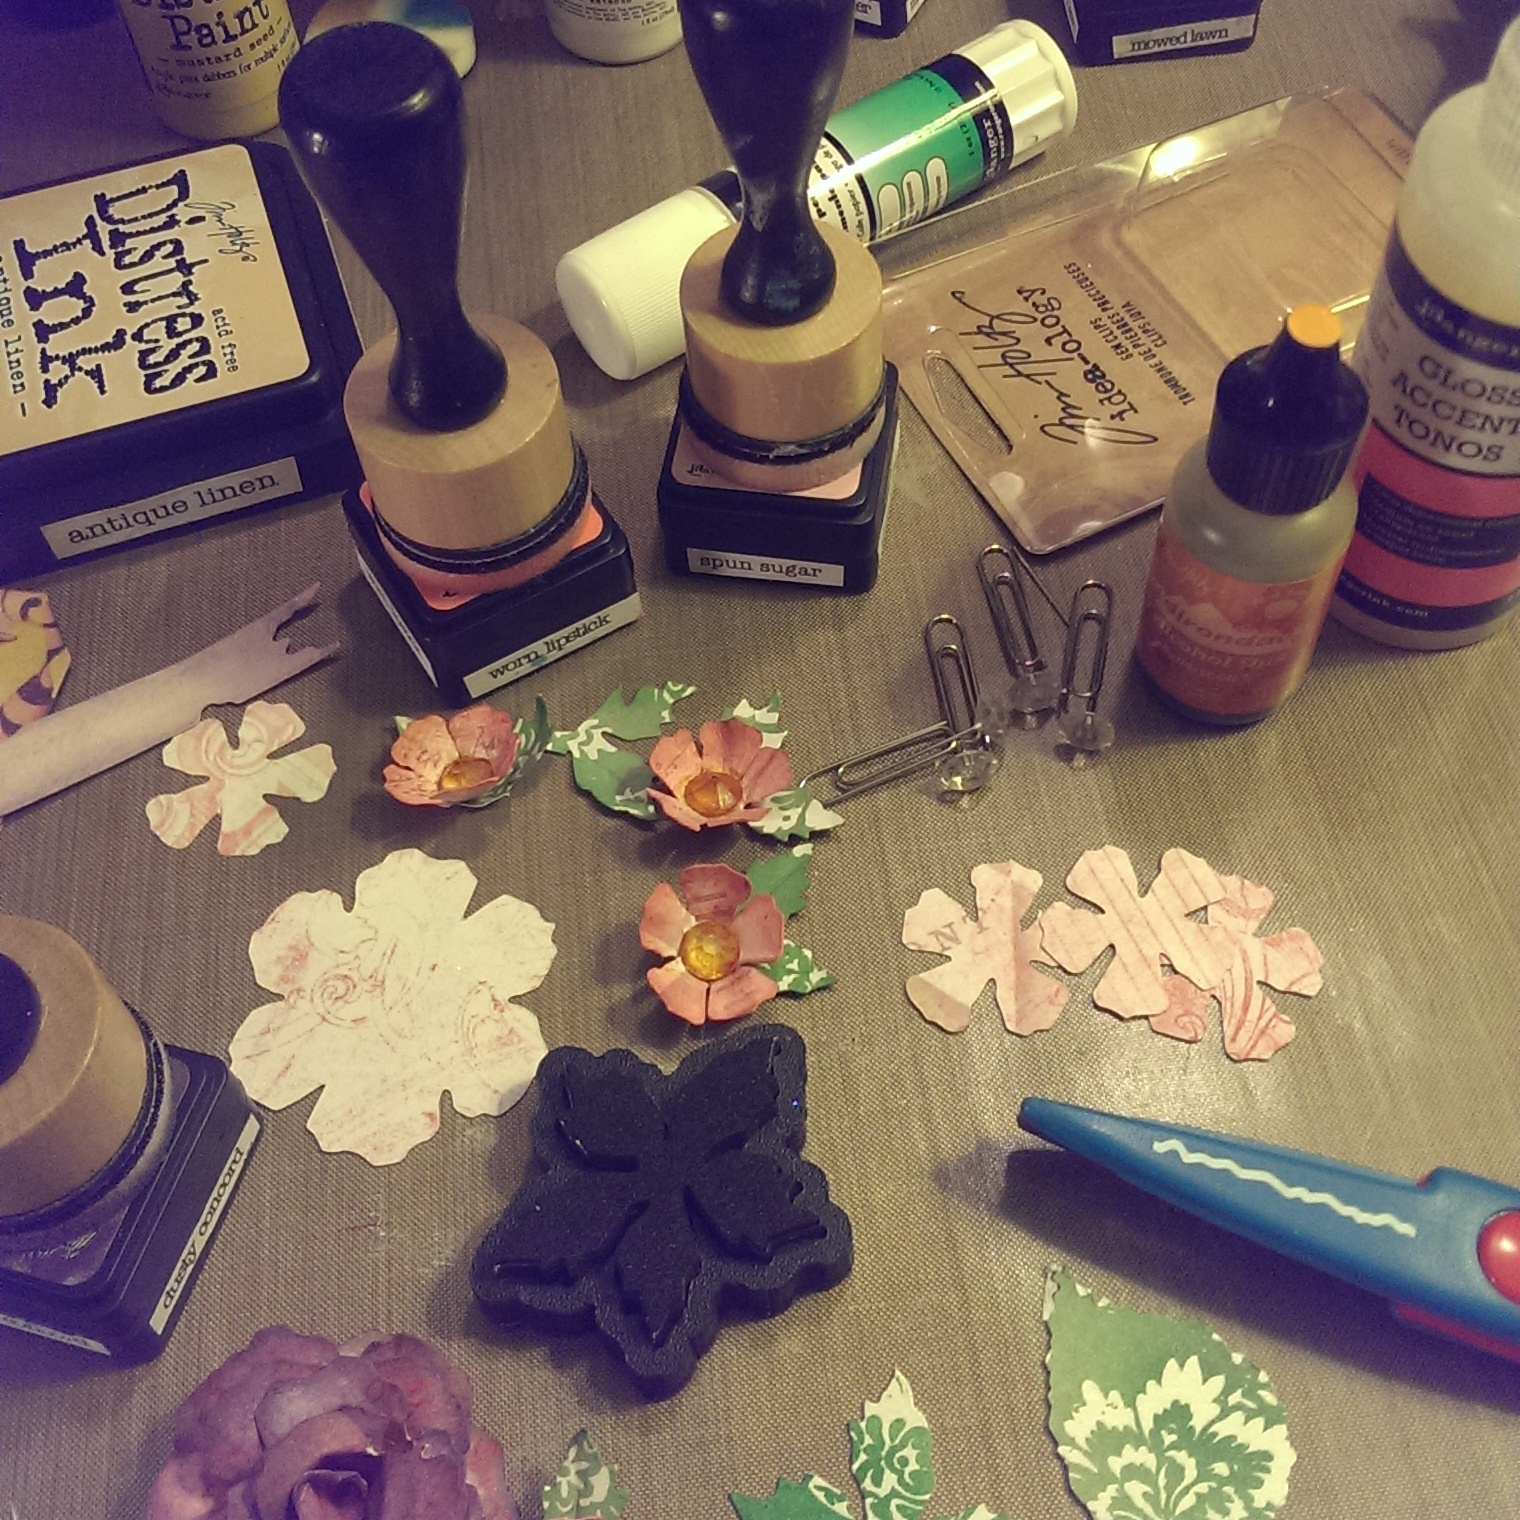
I realized I needed more of the smaller flowers.
Alcohol Ink on Gems

After finishing my base tag, I decided to create some flowers using one of my favorite dies, Tattered Florals. I used the pink pattern paper from Tim's Vintage Shabby Paper Stash.  For the smaller flowers I used the smallest flower on the Tattered Florals die and after inking it up and shaped the petals with my fingers. For the centers I took the gems off the ends of Tim's Idea-ology "Gem Clips" and colored them with Butterscotch Alcohol ink then glue them into the center with Glossy Accents.

Making leaves and flowers
The leaves for the smaller flowers are die cut from the Motif paper stash which includes both white and kraft colored paper with varnished designs that resist ink. I inked the paper up with Bundle Sage and Mowed Lawn Distress Inks, then die cut them with the small Poinsettia mover and shaper die. I cut each poinsettia into sections with 2 petals for each flower. For the larger leaf, I hand cut a leaf shape using my very old deckle edged scissors. (I started scrapbooking when these were cutting edge technology!) I glued the leaves to the flowers. Once everything was dry I started playing around and arranging the flowers.

I used the Tattered Floral Die for the large rose. I used Dusty Concord Distress Ink and a blending tool over the Vintage Shabby die cuts. I won't go into all the details here but here is a link to a really good turorial by Hels Sheridan, one of the Curiosity Crew members, for a large rose.  It's not exactly how I made mine but really close.

I used the Tattered Banners die and Remnant Rubs to create my banners, and finished up my tag by adding a few Idea-logy embellishments colored with alcohol inks and of course a ribbon bow.

My Layering Stencil: Paint Resist tag before I started putting everything together.

Monday, June 15, 2015

Suncatcher with Faux Cracked Glass CC3C 30


.

When I saw Linda's beautiful red hummingbird feeder she made  from a syrup bottle I knew I had to make a Sun Catcher for the Faux Cracked Glass challenge. You can see Linda's beautiful feeder at her blog. It is one of the wonderful art pieces you will find  at Linda Ledbetter's Compendium of Curiosities 3 Challenge #30.

I actually finished it over the weekend but being NOT a great photographer had a really hard time catching the light for a good shot.

thefunkiejunkie.com


The sponsor for this challenge is The Funkie Junkie Boutique. Yes, one lucky winner will win a $25 gift certificate to shop for goodies. I love to shop there so wish me luck!  There is also a prize for The Curiosity Crew's Choice. It is a box full of fantastic goodies donated by Tim Hotz and Mario Rossi. You still have time to join the fun. Create your own entry and link it up the challenge is open till this Friday. You can find a ton of inspiration from the Curiosity Crew here and the rules here.


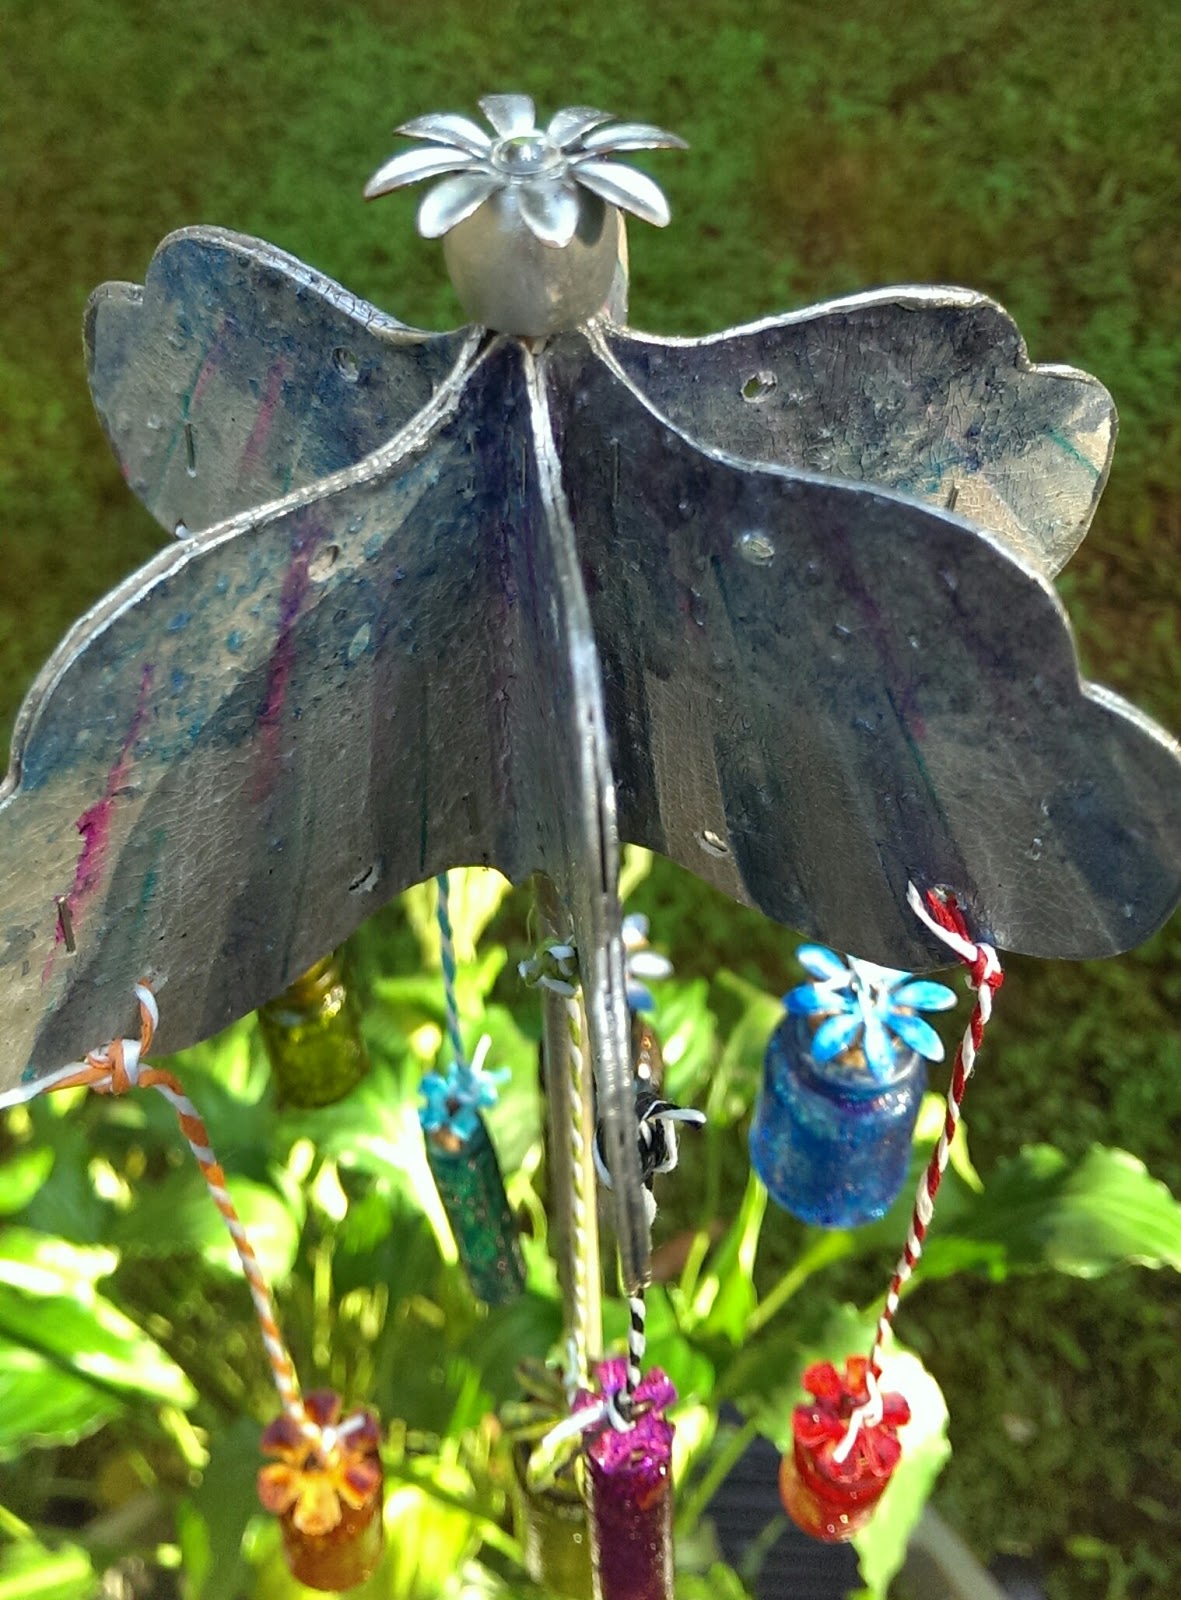
These little bottles are Tim's Corked Vials. I colored them using Tim's Faux Cracked Glass technique from page 54 of his amazing book "A Compendium of Curiosities Volume III". If you don't have a copy you can order it directly from Tim and he'll sign it for you.  You can see I've used Tim's screw eyes twisted into the cork tops to add his paper twine for hanging.


The little flowers on top of the cork are Idea-ology foliage painted with Picket Fence Distress Paint, then alcohol ink and finally Rock Candy Distress Crackle. Make sure each layer is completely dry before going on to the next. I placed Tim's Screw Eyes through the holes and then twisted them  into the cork stoppers to attach the flowers. 


I made a hanger for my Sun Catcher vials out of Grunge paper that I die cut with Tim's Styled Labels die, painted with Distress Cracked Brushed Pewter Paint and embossed with his Rays embossing folder. Years ago Tim showed us how to make an Alcohol Ink Palette by dripping alcohol ink into a palette and letting it dry. The Alcohol Ink Refillable Pen has a brush nib and a fine point nib. Filled with blending solution it makes an excellent brush for picking up the alcohol ink and coloring glossy surfaces. The Brushed Pewter Cracked Distress Paint dries glossy so I was able to easily color my labels with alcohol inks. I folded the labels in half, glued and stapled them together with the mini attacher and inserted a dowel into the center making the top for my sun-catcher. I used my crop-a-dile to add holes to hang the corked vials from. I topped off the top with a white wooden bead I had in my stash and another foliage flower. I colored both with Silver mixative alcohol ink and put a clear gemstone in the center of the flower. It reminds me of a little pineapple and the silver color goes great with the pewter. To finish it off I painted the dowel with Brushed Pewter too.


Now I can stick the dowel into a potted plant and place it in front of the window in my craft room.

Friday, June 5, 2015

Eroded Metallic - Compedium of Curiosities 3 Challenge 29


On page 44 of "A Compendium of Curiosities Volume III" you will find the technique for the latest challenge from Linda Ledbetter and the Curiosity Crew.. Eroded Metallic is a gorgeous technique and the Curiosity Crew has created another amazing array of inspiring art.

The Sponsor for Challenge 29 is Inspiration Emporium,  They are generously giving away a $50 gift certificate to one lucky participant. Tim and Mario have also donated some prizes to be given to the Curiosity Crew's Choice. So 2 chances to win! Wish me Luck!!!

I decided to use this technique to alter a chipboard box I have had for quite some time. I actually finished the Eroded Metallic technique part last week. And I have been looking at it ever since. I just couldn't decide how I wanted to embellish it.

When I was a little girl, someone told me that when I saw a Cardinal it was a sign winter was here. It wasn't until recently I found out this wasn't true. I did a little research and found out they stay in the same territory all year long. When I won my Christmas Cardinal die (Thanks Linda and Crew) I knew I wanted to use them on something that wasn't obviously winter so they are the focal point and inspiration needed to finish my box.

Of course, I can't tell you how to do the Eroded Metallic technique. It is against the rules. But if you've enjoyed reading my tutorials in the past and would like to see a one on this project, just let me know. I'll make a separate tutorial page and post it in a few days. (without the Eroded Metallic technique of course).


Friday, May 22, 2015

CC3C 38 Alcohol Ink Ombre, Remembering the Moment


Here is my tag for Compendium of Curiosities 3 Challenge. If you are curious about Alcohol Ink and want to know more or even if you like working with them and just want some inspiration, you should check out this challenge. Linda Ledbetter and her Curiosity Crew create beautiful artwork for this bi-weekly challenge that promotes Tim Holtz's A Compendium of Curiosities Volume 3 and this week they all used the Alcohol Ink Ombre technique.

The background of my tag is created with Tim Holtz's Alcohol Ink on Gloss paper from Ranger. The technique is Alcohol Ink Ombre shown on page 57 of Tim's Volume 3 of A Compendium of Curiosities.

I've also used Wendy Veccki's Clearly for Art modeling film and Tim Holtz wood block Butterfly Stamp E1-1538 from Stampers Anonymous for the butterflies. I stamped the butterflies with Archival Jet Black ink on one side. On the other side of the film I used the Alcohol Ink Ombre technique. Then I cut out the butterflies and heated the modeling film with my heat tool and shaped it. Once it cools it holds the shape. You can heat it as many times as you need until you get the shape you want.

The other stamps I used are also from Stampers Anonymous, Urban Chic CMS086 and Mini Cirque CMS079.

Funkie Junkie Boutique is the sponsor of Challenge 28. I've shopped with Linda before and she has great selection and prices. Of course she has wonderful customer service too. There is also a chance to win a special prize (donated by Tim Holtz and Mario Rossi) awarded to the Curiosity Crew's Choice. Check out all the details at Linda's blog. This challenge ends tonight at midnight but a new one will start tomorrow.

I love the challenge and I love Tim's book. Of course I'm not the only one. There are quite a few talented artist that link their artwork to CC3C so If you are looking for inspiration you will find it just a click away.

Saturday, May 9, 2015

Curious how Time Flies CC3C 27

Another Friday night and another late night post. Just finished a tag for CC3C #27 Embossing Diffusers. Loved working on this project. I don't use my embossing folders nearly enough and although I have played around with my diffusers I hadn't created anything with them until this tag. If you follow my blog or are a participant in the CC3C you know that every other week Linda Ledbetter issues a challenge based on a technique in Tim's book and if you participate you might win a prize! I have won in the past and let me tell you I love getting happy mail.

Challenge #27 is Embossing Diffusers on page 61 of A Compendium of Curiosities Vol 3. The sponsor is Inspiration Emporium and of course a special prize is awarded to the Curiosity Crews' Choice from Tim and Mario. You can also see some inspiring creations by the Curiosity Crew.

Once you checked out the technique in Tim's book you'll understand how I started my tag. Now I did ink up parts of my embossing folder with Distress Ink before embossing but I can't go into detail about that because of the rules of the challenge. But after the technique I did a little blending with Distress Inks and then added some Distress Rock Candy Crackle Paint over the entire tag. Once the crackle is dry the Live the Life You've Imagined sentiment from Creative Muse CMS046  is stamped with Jet Black Archival Ink. Then I stamped the heart from Love Struck CMS082 repeatedly to add interest to the background. Both stamp sets are from Tim's line from Stamper's Anonymous. I used Ranger Ink Archival Inks because they will dry on slick surfaces such as Rock Candy Distress Crackle Paint.

Several years ago, Tim had shown us how to create an alcohol ink palette by dropping alcohol ink into the wells of a palette and letting it dry then using the refillable pen filled with blending solution and color with it. I used my pen and Terra Cotta alcohol ink from my palette to color in the one heart stamped on the background and the Idea-ology heart hanging from the pin on the ribbon and the page corner on the lower right corner of the tag. Cherish on the idea-ology tag is highlighted in Cracked Pistachio Distress Paint the Idea-ology foliage is unaltered.


Saturday, April 25, 2015

So Many Stamps to choose from...

When I realized that time was running out for the Smudge Stamping Technique at Linda Ledbetter's Compendium of Curiosities 3 Challenge #26 I got out all of my Tim Holtz stamps, my Distress Inks and my #8 manilla tags and started playing. I ended up using 8 stamps from 5 different sets. After 3 attempts I figured out the right placement of the stamps and colors I wanted to use. One thing I found out quickly is that this is a fun technique and I will be using with it more.

Curious about how it's done? Get out your copy of Compendium of Curiosities Volume III and turn to page 42 to find out all about Smudge Stamping. Don't have your own copy you can buy an autographed book from Tim here.

Want to see some more examples? Go to Linda's blog and see the amazing art she and the Curiosity Crew created. You can even check out the art from other creatives who have answered the challenge.

The sponsor for this challenge was The Funkie Junkie Boutique. If you follow my blog you will know there is also a Curiosity Crew Choice winner (who wins a box full of goodies donated by Tim and Mario!), and an honorable mention.

 I'm keeping this post short tonight. I had so much fun I lost track of time and it is awfully late here in Georgia. Lucky for me the challenge is open until 11:59  MST.

Tuesday, April 14, 2015

Texture, Layers and Frameworks for Tim's April 12 Tags of 2015

Just so you know and in case you haven't seen Tim Holtz's April 12 Tags of 2015, I didn't use the same techniques Tim did this month. But I did use his design for his April tag to complete one of the framework tags that I created earlier this week. In my last post I shared that I was having so much fun working on my entry for the Compendium of Curiosities 3 Challenge #25 Frameworks that I made 3 backgrounds. I worked on all 3 simultaneously until I reached a point where I could decide which one to finish for the challenge.

The background for this tag is one I didn't use for the challenge because I really liked it so much I didn't want to cover it up. I was saving it for later. This weekend when I was thinking of Tim's April tag and wishing I had the Flower Garden Stamp (It's the next stamp on my wish list), I realized that even though I didn't have the stamp to use for the wonderful water coloring effects Tim had demonstrated, I could use my frameworks background and some of Tim's other products to create a different version of the April tag. The April design would let the background shine through instead of hiding it.

I started with a Kraft tag I embossed with one of Tim's embossing folders. Then I lined up a couple of the extra honeycomb frames I had die cut with the Frameworks diecut I was keeping on the tag, taped them down and used them as stencils. After applying some texture paste thinly over parts of the dry embossed tag, I removed the stencils. Once the paste was dry I then inked it up with Distress Ink. You can see the dry embossing peeking through the paste. Love the texture.

Keeping in the spirit of the CC3C Guidelines, I'm not going to go into the detailed instructions for the rest of the Frameworks technique because they are in Tim's book. He does an excellent job showing fun ways to use the die and has beautiful step by step photos. You'll find them on page 64 of his book, "Compendium of Curiosities Volume III". 
 
To create my Black-Eyed Susan flowers I used some techniques from "A Compendium of Curiosities" Volume II. I used Tim's Crumpled Kraft Suede Technique from pg 40 on Glassine paper to create the flower centers and then on watercolor paper to create the flower petals. The petals were die cut from Tim's Tattered Florals die and water colored with Distress Markers. The paper twine for the flower stems and for the top of the tag was colored with Cracked Pistachio Spray. The Grungeboard star is from a stash I created when first learning the Shattered Stains technique also explained in Volume II on page 48.

Since my background was already created on a No. 8 tag and I didn't want to trim it down, I used a larger Kraft tag and trimmed it down to leave a 1/4" border on the sides and bottom with a little more room at the top. Then I followed Tim's instructions to cut the 1" strip for my tag to weave through and for the word LIFE to be die cut out of, letting the tag underneath show through. Yes, I do have Tim's ruler and it makes this step so easy. I don't have the Adventure Words dies that Tim used so I die cut my letters out of cardstock with Tim's Alterations Chipped Block die strip, glued them down and carefully cut them out with a craft knife. I inked the backside of the tag where the letters are cut out to add definition. Love the effect of the negative space. The Adventure Words block dies would be fun to use and time saving dies to have.

To finish off my tag I added the machine stitching as shown on Tim's tag. I used the Chit Chat word "beautiful" and colored the edge with Cracked Pistachio and a waterbrush. I really like how my April tag turned out but when I get the Flower Garden Stamp I will revisit the Tim's April tag and try out these techniques. I really love the spritzed background.

Now I have another tag inspired by Tim Holtz 12 Tags of 2015. Tim has a way of showing us how to use his products in ways I haven't imagined yet. That's why I follow his blog, have his books, have taken his Creative Chemistry Classes and love his products. He encourages us to be curious, try new things and get our fingers inky. His tag is gorgeous this month and I really hope you visit his blog here and see it.

Friday, April 10, 2015

Fly with Courage. Frameworks - CC3C Challenge 25

Linda Ledbetter's  Compendium of Curiosities 3 Challenge # 25 comes to a close tonight and I have finished my tag. The challenge is to open your copy of "Compendium of Curiosity Volume 3" by Tim Holtz, turn to page 64 for Tim's instructions and tips on how to use his Frameworks die. Then create something fun and link it up to Linda's Blog.

Inspiration Emporium is the sponsor for the challenge and one lucky winner will receive a $50 gift certificate. There is also a Curiosity Crew Choice winner who gets an amazing box of goodies that Tim and Mario donated along with a badge for their blog and one more person gets an honorable mention along with a badge for their blog.

I've had so much fun with my Frameworks die that I was working on 3 different backgrounds at the same time. I have one background I like too much to cover up yet and one that I am definitely seeing some definite possibilities for and the one you see here.

Botanical Sketch.
The one I decided to go with for the challenge is the one that everything just seemed to pull together on. Once I got to a certain point I just couldn't stop. The background of the tag was created using Tim's wrinkle free distress technique in a variety of blues. Then I used a section of the Botanical Sketch Stamp CMS216 and Chipped Sapphire to stamp the edges on both sides of the tag then embossed with Antiquities Frosted Crystal from Ranger. This adds dimension without the gloss and I love the feel.  I inked up a ribbon and ran it down the center of the tag to cover the gap.

The next step was to use the Framework die so check out Tim's book for the instructions.

I used all the butterflies from Thrift Shop Ephemera Pack. I used Distress Markers and a water brush to colorize the front and back of the butterflies, and the edges of the wings. I shaped the body and wings to give them more dimension. The largest is up on 2 sets of pop dots. The Oval and smaller butterflies are on one layer of pop dots. You can see the back of the butterfly wings reflecting in the mirrors.  I also used Industrious Stickers, Remnant Rubs, and paper twine.

I love my Distress Inks. Whether using ink pads, markers, stains or sprays, there are so many ways to apply and alter these amazing inks to paper, fabric, ribbon, twine and more.

If you are looking for more inspiration for Framework dies check out what the Curiosity Crew did at Linda's blog. You'll find more amazing pieces of art. Tags, cards, art journal page and a canvas. You can also find inspiration in Tim's books and on his blog. Oh! I was testing the link and this just saw this! He just posted on his blog this morning that he has 4 new products! Got to Go and watch the product videos!
You'll be seeing the backgrounds on the left and right soon!
have courage, FLY!

Edited to Add that I did finish the brown background. I used it to create my April tag inspired by Tim's 12 Tags of 2015. You can see it here.

Saturday, March 21, 2015

My Happy Life

The current challenge at Linda Ledbetter's CC3C is Remnant Rubs! So grab your Compendium of Curiosites Volume 3, check out page 51 and then go to Linda's blog for some amazing inspiration. Now grab a pack of Tim's Remnant Rubs and have some fun creating something.

Tim shares a lot more techniques in his book than I used on my tag. Mainly because I am using a very large stamp from the Botanical Sketch CMS216 set. This set is one of Tim Holtz's new stamps from Stamper's Anonymous and is sure to be one of my favorites. It features a beautiful 5"x6" stamp that is a line drawing of flowers with an open space in the middle of the stamp for a sentiment and the set includes several. The image is beautiful to color. Once I stamped it and added the Remnant Rub, I knew that when I was through coloring, I would only need to add a few elements to finish it off.

Tim designed this stamp set with cardmakers in mind. It is larger than a standard size card, so by moving it around on your card surface you can position the opening in different places on your card. For me, it turned out perfect for my tag. The opening was the perfect size for the Remnant Rub I picked out from the Life Quotes set. I stamped the flowers in Jet Black Archival Ink. At 6" tall it didn't quite cover the entire tag and left a small strip at the top but I just re-inked the stamp and stamped that area careful not to overlap the image. As you can see, I covered the seam with Tim's  harlequin tissue tape. Unless you know its there you can
t even tell.

I used Distress Stains to create a wash for the background and colored in the image with Distress Markers. I had so much fun. I love this stamp and plan on using it a lot.

To finish off my tag, I painted one of Tim's Idea-ology birds with Distress Paint using Chipped Sapphire, Broken China, Red Barn and a little Walnut for the beak. After the paint dried I sanded a little of the color off for highlights. The bird's crown is also from Tim's Idea-ology line and has been altered with Tim's Alcohol Ink in Gold Mixative and added with a glue dot. I used pop dots to attach him to the top of the tag.

The sponsor for this challenge is The Funkie Junkie. Linda has a great prices and selection and wonderful customer service. There is also a special prize from Tim Holtz and Mario Rossi for the Curiosity Crew's choice. So what are you waiting for? This challenge is open through Friday, March 27, 2015. Visit Linda and her crew, open Tim's book and get inspired!

Saturday, February 21, 2015

Inspiring Curiosity


Yes! Another Compendium of Curiosities 3 Challenge completed. If you haven't check out Linda Ledbetter's challenge, maybe you should. This  is Challenge #22 and uses the Dimensional Cutting Pad as shown in "A Compendium of Curiosities Volume III" by Tim Holtz. On page 62 you will find 6 detailed photos along with detailed instructions that walk you through, step by step, how to use the Dimensional Cutting Pad. At Linda's blog you will find the challenge details and 9 fabulous projects created by the Curiosity Crew using this technique. If you don't have a Dimensional Cutting Pad yet, you may want one after seeing what Linda and her crew created. Everything from cards & tags to an art journal page. There's even a home decor project for a fireplace mantel that doubles as an accordion album.

Challenge #22 is sponsored by The Funkie Junkie Boutique  who has provided a gift certificate to one lucky winner so they can go shopping at their excellent online boutique. They not only carry Tim Holtz products but have just about anything you need for your vintage projects. You can even set up a wish list (which I have)! There is also a special prize awarded (thanks to Tim and Mario!) to The Curiosity Crew's Choice and the lucky selectee not only wins an amazing prize package but also gets a banner for their blog. Too Cool!

I did something a little different this time. I started with a #12 size tag. At 5 1/8" x 10 1/2", this tag is huge compared to the size I usually use. Why so big you might ask? Two reasons. The first is I wanted to use at least one product, technique or idea from each crew member's tag that inspired me. I needed lots of room because they are very inspiring. The second is I love Wallflower Paper Stash and especially the page with the two birds side by side on the branch. With the #12 tag I had enough room to use the 12x12 size which has the largest image of the birds and still have room for my die cuts.

Lots of fun techniques here. Everything from Distress Ink, to Distress Markers, Tissue Tape and Remnant Rubs to Idea-ology, Stencils, Stamps to Die Cuts and Papers. That is real bird seed in the vial and I didn't have green felt so the leaves for the felt flower was die cut from white felt and colored with Lettuce Alcohol Ink and Blending Solution.

I always want to give thanks to Tim Holtz for all his amazing products, tutorials and ideas and to Mario for his hard work behind the scenes and his amazing BTS updates and to both for their generosity is making time in their busy schedule to share so much.

This week I also want to thank Linda, Anita, Annette, Candy, Cheryl, Hels, Marjie, Susan and Yvonne.

Even though I used something inspiring from everyone's project here, there are still plenty more ideas that I can use to jump start another project. You guys inspire me... all the time.


P.S. Linda's challenge is open through Friday, Feb 27.

Thursday, February 12, 2015

Rock Candy Distress Glitter Wishes

Compendium of Curiosity Challenge # 21
Want a gorgeous sparkly background for your next project? Use Rock Candy Distress Glitter. If you've never used it before, check out Tim Holtz's Compendium of Curiosities Volume 3 pg 55 for a step by step picture tutorial. This is the technique the Curiosity Crew selected for Challenge #21 of Linda Ledbetter's CC3 Challenge. I wish I could capture the sparkle of the Rock Candy. You can't really tell from my photos but it is covering the wings on the tag.

I had participated in the last couple of challenges and decided to join in on this challenge too. I had fun with the technique and made 3 different backgrounds. I used basically the same colors and stamps but changed up which element got what color. Each background had things I liked about it and I finally picked one for my project only to change my mind half way through. Fortunately all of my elements hang from a couple of chains through the top of the tag so it was simple to switch out the background.

One of the things I wanted to do was use all the stamps from one stamp set on my project. I selected Tim Holtz Royal Script CMS016 from Stampers Anonymous. The colors of Distress Ink I used were Old Paper, Antique Linen, Victorian Velvet, Spun Sugar, Seedless Preserves, Dusty Concord, Weathered Wood and Peeled Paint.

I used Sizzix Premium Crease pad when cutting the tag out of vellum. It keeps the paper from tearing or cutting on the crease lines. I stamped the crown on the front of the Vellum and embossed with Ranger's Fine Detail Clear Embossing Powder. I used Spun Sugar Distress Marker to pick up Dusty Concord Distress Marker scribbled on the non stick craft sheet to color and blend the border on the back side of the vellum to frame it.
I wish you could see the sparkle!

The foil letters are die cut from Tim's Alterations Carnivale for WISH. They were then embossed with the embossing folder (also using the Premium Crease Pad) and painted with Spun Sugar Distress Paint. Once dry the letters were lightly sanded and inked with Victorian Velvet and heat set. Then I use Spun Sugar and Seedless Preserves to color a torn strip of manilla tag adding the letters to it and pop dotting the strip on top of the vellum under the crown.

I used silver mixative to alter the ball chain, fleur-de-lis and the jump rings so they would complement the pearls which had silver findings. I was able to easily cut the ball chain to the lengths I needed with Tim's tonic scissors and then add the pearls with the jump rings. I just punched small holes in the center top and bottom of the vellum and put everything together.

I started with the background on the left but switched to the one on the right.
The current challenge ends on Friday Feb 13th (which at the time of this post is tomorrow) and is sponsored by Inspiration Emporium.
Of course there is also a Curiosity Crew Pick who wins an amazing prize from Tim and Mario and the fun of playing along. As always I encourage you to check out the lovely inspiration at the challenge post here.

Thursday, January 29, 2015

Distress Watercoloring – Love at First Sight!

When Tim Holtz first introduced his Distress Markers I instantly fell in love with them. I have never been in love with markers before. I've met some I really liked, but not "Loved". I was happy to see the CC3 challenge #20 was for Tim's Distress Watercoloring – Part 2. Using not only his Distress Markers but also the Spritzer tool. Another tool I had to have because you can use it with the Distress Markers, which of course I love.

A quick note about the challenge. Linda Ledbetter is the host. The challenge runs two weeks and is to create something using a technique Linda selects from Tim Holtz's book "A Compendium of Curisosities Volume 3" (I can't explain how I did the technique because You need to work from your own copy to participate). Challenge #20's sponsor is The Funkie Junkie Boutique a fun online store with amazing products and fantastic prices. Some lucky participant will win a $25 gift certificate to her store and yes, she is accepting pre-orders for the new Cracked Pistachio. There will also be a special prize from Tim and Mario awarded to the Curiosity Crew's pick! YAY! You can get a ton of inspiration from Tim's books and also the Curiosity Crew Members each have a inspirational piece on Linda's blog with links to their own blog too. So much amazing talent.

Now back to my entry.

So with all this love, I guess you can see why I picked out the Love Conversation Hearts from  Tim's Mini Blueprint 2 CMS146 set. I stamped out th heart 6 times and started playing around with different colors just to get an idea of what color I might like to use for my card. Before I knew it I decided I liked the way it look with the 6 hearts and that it would be focal point of a card. I followed the instructions from Tim's Compendium of Curiosities Volume 3 to finish the panel (You'll have to check out page 40 in his book for the details).

I checked my stash and found I didn't have any paper I liked for the background so that led me to make my own pattern paper. Using the Love ticket stamp (Love Struck CMS0820) and Crimson Archival Ink I stamped the ticket repeatedly at an angle on a sheet of Idea-ology Kraft Glassine paper. I used Clear Fine Detail Embossing powder (Ranger) and heat embossed the ink. You can stamp with pigment ink on the glassine and use a heat tool to bake in the color but I love the look of the embossing powder. I used a 4.5 by 6.25 card base which is a little larger than standard size so more of this fun background would show.

GOOD FOREVER
Original - DATE SOLD ONLY
The stitching the red and white x's across the top was easy to space out using Tim's ruler. Pearl mixative gave the Idea-ology tassels a softer more romantic look. I love the sound the tassels make when I shake the card. I decided to finish off with the Love ticket stamped on water color paper again using the technique on page 40 and added another tassel. The only thing was that the ticket says Good Date Sold Only. Since this had quickly turned into a Valentine for my husband, I wanted a message that wasn't limited to one day, I used a Picket Fence Distress Marker to cover up the date sold only (scary) text and found the word forever in a pack of Botanical Remnant Rubs. Perfect! Now he will know I'll admit I Love Him forever.

Thursday, January 15, 2015

Inspired by CC3

Inspired by Compendium of Curiosities 3, Tim, Mario, Linda and the Curiosity Crew!

create

spread your wings

take flight


Sometimes it takes me a while to get back into creating. I love to spend time with my inks, stamps, papers and just about everything in my stash. Getting started on a project is the hardest part. One reason why I love the bi-weekly challenges at Linda Ledbetter's blog is that they can get me started when I've been away too long.

Linda hosts the Compendium of Curiosities 3 Challenge. She picks a technique from Tim Holtz's Compendium of Curiosities Vol III, then she and her amazing Curiosity Crew members create amazing art that is wonderfully inspiring using the selected technique. The current challenge is sponsored by Inspiration Emporium who are generously donating a $50 gift certificate for Linda to give away. Tim and Mario have also donated amazing products for a special prize. (More reasons to create something.) So 2 lucky people will be very excited when the winners are announced! All the details can be found on Linda's blog here. Challenge # 19 is Frayed Fabric and detailed instructions can be found on page 66 of Tim's book. This challenge is open through tomorrow Friday January 16.


Frayed Fabric technique from CC3 pg 66
I have been wanting some of Tim's Eclectic Elements fabric and needed some for this challenge, so I picked Tim's 12x12 Traveler's pack. I am so glad I did. I love the feel of this fabric, enjoyed working with it, and I have plenty left for future projects. I wasn't sure exactly what I wanted to do so I just jumped in following Tim Holtz's directions and made two tag bases. Once they were completed, I decided to work with the butterfly tag and save the postmark tag for a later project. I got out my stash and started playing. I laid a large oval fragment on top of the reverse side of another piece of the butterfly fabric. It was still easy to see the butterfly and use it as a guide to apply alcohol ink. Once I had the colors like I wanted I applied glossy accents to the fragment on the same side as the alcohol ink. I pressed it down firmly onto the front side of the fabric and slid it around gently to line up the inked areas with the butterfly and get a smooth even coat. After the glossy accents dried I trimmed off the excess fabric with scissors. You may have seen Tim use this technique in the past with paper when his fragments first came out. If not and you have his original Compendium of Curiosities (the first book) you can check out Tinted Vision Fragments pg 55 and Fragment Basics pg 62. The only difference is you are using fabric instead of paper, and I recommend working on your non-stick craft mat. Once the fragment was trimmed out I added some of Tim's rub-ons to the surface of the fragment. I melted some Platinum UTEE in Ranger's melting pot and dipped the edges of the fragment in the melted UTEE to get the faux soldered edge. I thought the color went well with the Idea-ology leaves so I left them the original color.


I diecut a ticket from the wildflower paper line, used the hearts embossing folder, mini distress inks and another butterfly rub-on. The word inspired is also from the same rub-on set but created by taking the d off of dream and adding it to the end of the word inspire. I layered another ticket diecut from foil and grungeboard using painted industrial technique and layered it underneath, stapled them together with the mini fastener and then added it to the top of the tag, tucking it behind the strip of fabric. You may remember the Painted Industrial Technique from July when I used it  for Challenge #7 to create a box to display my tags. If you want to see it again you can check it out here.

The details!
For the Volume 3 embellishment I used the # 3 paper clip an added an image of Tim's book. The 3 was a little lost with the fabric showing through so I colored a small piece of white paper using Distress Markers in Broken China and Tumbled Glass then used Faded Jeans Distress Stickles to glue it to the back of the clip behind the 3. I used Tim's Shattered Stains technique (Compendium of Curiosities Volume II, pg 48) on the Grungeboard heart. I added a butterfly rub-on to the sticker on the brad before adding the epoxy dome then applied the word fly on top of the epoxy.

With the holidays and a part time seasonal job, it had been way too long since I've been visiting my usual blogs and websites I follow, much less created anything. So I decided to see what the challenge was at Linda Ledbetter's. I was glad I did. I had fun, tried something new and now I have a new tag and I'm creating again. Linda is a wonderful source of inspiration and creativity. She is an amazing photographer, has some great tutorials on a variety of subjects and of course she is (like me) also a big fan of Tim Holtz. So if you haven't been by her blog yet be sure to check her out. Besides the wonderful inspiration, you'll also get to meet Violet. She's adorable!


Friday, September 12, 2014

Assemblage Clock for CC3C

Here is my Assemblage clock for Compendium Of Curiosities 3 Challenge at Linda Ledbetter's Studio L3. If you want to see some really gorgeous Assemblage Clocks check out the challenge here and see what the Curiosity Crew created. They are amazing and once I saw them I knew I had to try my hand at one. The sponsor for this challenge is the fabulous Funkie Junkie Boutique, they have an amazing selection of crafting supplies for vintage projects including a great selection of Tim Holtz products. Amd of course there is always another fabulous prize from Tim Holtz and Mario Rossi.You can find instructions for altering the Assemblage clock on page 33 of Tim Holtz "A Compendium of Curiosities III" which you need to participate in the challenge. You can buy an authographed copy directly from Tim Holtz here.

Monday, July 28, 2014

A Little Paint, A Little Glitter, A Little Book


"Finish Me!"
Although I was excited when I saw Linda Ledbetter was sponsoring The Compendium of Curiosity 3 Challenge back in May, I missed the first few challenges. I started the first one. I used a Ranger Inkssentials #12 Craft tag to create a cover using Tim's Paint Marbling technique along with about 4 pages for a little mini album. I went out of town and never got back to my project. When I missed the deadline, I put it aside. I missed the second challenge too. It was Distressed Glitter. I love Distress Glitter but only have 2 colors, Rock Candy and Pumice Stone.

This cover has just been sitting on my desk ever since I returned from my trip saying "Finish Me!". Well I finally have. This weekend I decided to combine both of the first two challenges I missed, get out my "An Altered Journey" DVD and create a mini art journal.

My Signatures!
 I've had "An Altered Journey" for some time. It is 127+ minutes of techniques and instruction with Tim creating some beautiful projects. One of the projects is a Domino Diary. He uses Alcohol Inks on the Domino to create the front and back of the diary. For the inside pages he shows how to bind the pages by hand stitching to create signatures, including how to make a "Kettle Stitch" to hold the binding together. I love the old book feeling binding the pages this way gives. I wanted to give it a try. As usual, Tim's instructions made it easy.

Mirrored!
Once my binding was complete and my cover attached,  I started to decorate it. I die cut an oval out of a piece of  Idea-ology Mirrored with Tim's Alterations Tag & Bookplates die. It fits perfectly into an Idea-ology Ornate Bookplate. Alcohol ink gives the outer edges of the mirror an antique look. I stamped the butterfly with Stayon Opaque Baby Blue. I also made a little pocket for the inside front cover and tucked some Apha Cards inside it.

Inside Front Cover Pocket
The closure is made from some ruffled elastic and a medium size pearl from the Idea-ology line.By punching a small circle in Grungepaper and centering it in a little bit larger circle punch I was able to make 2 reinforced holes that were a little larger than the one that comes on the tag. I painted it with Brass Distress Paint and gently stretch it until the pearl would slip through and hold the cover shut.  I love that the pearls already have the findings. I just had to twist the wire on the drop pearl open to attach it to the bottom of the Ornate Plate.

Painted Marble and Distress Glitter Tag Journal with Ornate Mirror and Pearls

Here is my finished Art Journal. In the spirit of the challenge I haven't given instruction for the Painted Marble or Distress Glitter. You'll have to check out Tim's book for that. Even though the  CC3C #1 & #2 challenges are closed I'm glad I finished my art journal. If you'd like more inspiration for these techniques you can check out Linda's Blog. To make it easy the link for Challenge #1 is here and Challenge #2 is here.

Thanks for stopping by. Please leave a comment. I'd love to hear from you.

Related Posts Plugin for WordPress, Blogger...