Sunday, December 11, 2011

12 Tags! Day 4 and 5

Blustery Winds
Yes! My  Day 4 Snowman Tag and Day 5 Alcohol Ink Acetate Tag are completed and posted! Just Day 6 to go before I can be back working in order and back on track to complete Tim's 12 Tags for 2011.

December 4th it was snowing all day in Arizona where Tim lives and he was "Dreaming of a White Christmas" and it showed on his tag.  I love Tim's snowman tag and tried to follow it as close as possible. I love the look of the music paper with glossy accents showing through where the 25 is cut out from the snowman. The shiny, glossy white with blue tones and cracks is such a wonderful contrast with the aged paper. I can't imagine Christmas without images of snowmen and sounds of Christmas Carols filling the air.

I had learned the rock candy crackle and stains technique when Tim was a guest instructor in Jennifer McGuire's Inspiration Showcase class and I wrote a post about it here. I was so happy to see it used on this tag with the added step of using the white paint dabber first. During Inspiration Showcase, we did not paint the grunge before applying the rock candy. I must say I really love this look. I do not have the snowflake border die so I used the flourish die to cut out acetate. It looks to me like gusty swirls of wind.

Texture!
Acetate and Alcohol Inks
The Acetate Tag proved to be a challenge for me. I use one of the stamps from Tim's Stampers Anonymous Reflections CMS111. This one is a lighter font and while it works great for other techniques the ink dries a little fast in this lighter face and it is not quite bold enough for the full effect when stamping with the Archival Jet Black to remove the Alcohol Ink. I decided to stamp over the text with Tim's harlequin stamp from Creative Textures CMS 004 also from Stampers Anonymous. You can still see the texture of the writing where the alcohol ink was not removed by the second stamp and the added texture of the layers of alcohol ink and the distressed harlequin pattern. Tim backed his acetate tag with a pure white tag but I blended some light layers of distress ink in Evergreen Bough, Shabby Shutters, Antique Paper and Vintage Photo on mine. It gives it a wonderful watercolor effect. The tree is from Tim's Seasonal Grungeboard pack and thouroughly inked with Shabby Shutters then embossed with Peeled Paint Distress embossing powder. The star is from his elements shape grungeboard pack. The German Paper at the bottom is diecut from his new Victorian Lace die. Both are heat embossed with silver empossing powder. the tree trunk is just a little snip of twine ribbon.

Of course Tim Holtz has completed all Twelve Tags and it has been a fantastic 12 days. Every day for the last 12 days I have been following Tim's and Mario's adventures with The 12 Tags of Christmas and Behind The Scenes. Even with all kinds of internet problems they both worked diligently to make sure they shared with us the joys of inking, stamping, exploring, creating, sharing and giving and the posting of The 12 Tags of Christmas. They are amazing.

12 Tags! Day 7

Alcohol Ink Glassine and Ghost Stamping
You may be asking "Where are 4, 5 and 6?" If you are, I admit they are not done yet. I am working on several of the tags but wanted to finish this one today because it is nearing the deadline for Grungy Monday 29. Yes, It's back! Linda has been faithfully completing all the tags in order and hers are beautiful. I on the other hand, have gotten behind. I had planned on completing several tags today but decided to concentrate on finishing my favorite Tim Tag to post for the challenge. This is it. I love these techniques. It has distress ink , alcohol inks, grungeboard, ghost stamping and embossing. I don't know which technique I like best, the alcohol inks on glassine or the ghost stamping. I have never heard of this technique before and loved the effect. Check out the techniques here on Tim's blog day 7. Check out Grungy Monday 29 here.

One more reason I enjoyed working on this tag today is that my daughter Valerie was home and she was my consultant while I was working on the tag. Valerie also enjoys scrapbooking and cardmaking. She helped me me with placement on a few items. When I decided that my leaves were just too big she helped me by scrunching them up for me and she also came up with the branch idea when I couldn't get the two muse tokens to hang where I wanted them too. And she always gives me plenty of encouragement.  Thanks Valerie!

Tuesday, December 6, 2011

Tim's 12 Tags Blinkie!


I'm so excited because now there is a blinkie you can add a to your blog to let everyone know you are participating in 12 tags! OK, I am getting a little behind but I am participating. I will be getting together with some friends on Thursday at my local Archiver's to work on Tim's 12 tags. We will be pooling our supplies to see if we might have a more complete selection to work with and having fun creating our versions of Tim's 12 tags. I know Carolyn has the Snowman die which is what I need for my next tag. I have the Mini Reindeer and 25 and the Tag and Bookplates die and the Alcohol Inks and packaging for the next tag. Mary Jane has ALL the distress inks (except the Fall Seasonal but I think she's working on that). You know the "Whole is greater than the sum of its parts" type thing. So right now I am gathering up my supplies, cutting  pieces and getting ready for Thursday while daily checking out Tim's 12 tags.

Tim is giving us until December 31st to post our tags and Linda Ledbetter at StudioL3 is giving us until December 11th to participate in Grungy Monday 29 and post our favorite tag from this years tags. So given my deadlines I am not behind at all. I'm just pacing myself.

Thanks for stopping bye.

Sunday, December 4, 2011

12 Tags! Day 3

Really Different
Sometimes it's best not to have ALL of Tim's great products. Really? No, but if I can't have them all at least I am learning from the experience. It does help that I have been following 12 Tags since they started in 2007 and that I do have a lot of Tim's Stuff.

I love the Tag Tim created for day 3. Not having everything and wanting to follow his tag as closely as I could had me rumbling through my stash and coming up with some new ideas, drawing on things I have learned from Tim and a few other sources and mixing them all up and coming up with what you see here.

I did have the embossing folder Tim used but not the stamp. I did have some  Cut-n-Dry Stamp Pad Felt and reinkers but not the colors he used. I did have the alcohol inks and clear gem stones and pearls but not the Festive Greenery Sizzix die.

German Paper from Tim
What I did have was a mini stamp version of the stamp he used in year 1 when he created a tag on Day 4 using this technique and some german paper I won from him that year.

I inked my embossing folder on the side that had the recessed images with Iced Spruce and embossed my tag. This gave me the embossed image with the background inked.  Then I cleaned off the folder an inked it with Evergreen Bough turning a second  tag in the direction Tim used when stamping to get the bottom section of the tag. I pieced the two together and added the German Paper to cover the seam. Now I had my Tim inspired but different background for my tag.

Inspired from 2007
I decided for the Cut-n-Dry technique to use a stamp from Mini Holidays CMS 066 that was the mini version of the stamp that Tim used the first year when using this technique on Day 4. I didn't have the same color reinkers he used that year but I think the colors I had to choose from go well with the Iced Spruce and Evergreen Bough. Since I had my Cut-n-Dry custom ink pad, I was able to stamp the image several times and layer them just like Tim did way back in 2007.

Just a snip between waves and wavy twine
The silver bells I used were really old and a little brassy looking. I quickly transformed them to a beautiful silver using the Silver Mixative Alcohol Ink. The pine sprig is from the pinecone die and the holly leaves are hand cut. The twine was ribbon. The heat tool made it curly but it was too bulky for the tag so I clipped the stitching between the waves and pulled it loose. I liked the effect.

Saturday, December 3, 2011

12 Tags! Day 2

When I saw Tim's tag this morning all I could do was sigh and think "Beautiful". To me, it reminded me of a peaceful Christmas scene where the forest animals are looking up into the sky. Check out Day 2 of Tim Holtz's 12 Tags of Christmas here.

I started my tag following Tim's instructions best I could using the supplies and products I already have. Like yesterday, I'll just tell you what I did different and you can check Tim's blog for detailed instructions complete with step by step pictures. Of course if you leave a comment on Tim's blog, you'll be entered in a random drawing for a prize!

I do have a Tim Holtz deer die but it is the mini deer that came in a set with a 25. His is much larger. He only used one deer. I have used two. I adhered the sticky back canvas to some grungeboard and cut one out, but I also cut out the second one just from just the canvas. After inking them up, I adhered the single layer of canvas to the tag first and then added the second one that was canvas on grungeboard a little lower and to the right. I used glossy accents to sketch in the outline of a snow bank around their feet and sprinkled on some sparkly flock. I had made my own from Martha's white flock and Hero Arts Prisma Glitter when Tim Used Sparkly Fluff Day 6 2009. It gives just a hint of a snowbank.

The edging at the bottom of the tag is cut out of gold shimmer paper using Tim's Vintage Lace Sizzlits Decorative Edge. The top strip is acutally a piece above the laces.

On the "listen" metal tag I used The alcohol ink mixative Snowcap with bottle, lettuce and stream. I also spritz a little perfect pearl mist on the tag. The brads came in the color shown. The star is hand cut from Grungeboard then embossed with several layers of silver embossing powder and then a little glossy accents and prisma glitter. Such Fun!

I was going for a peaceful scene with the deers gazing up at the star, listening.

Thursday, December 1, 2011

12 Tags! Day 1! Yea!

Finally finished my tag for the First Day of Tim's 12 Tags of Christmas. I got together with some friends today to get started. We met at Archiver's and had a blast. Next time I'm taking my camera and getting some pictures. Carolyn had cooked the most amazing potato soup and Mary Jane said next time she's bringing ziti.

Most of the things I did on my tag are following Tim's instructions. He has such wonderful step by step instructions and a fantastic video showing how to make the pine cones and tea roses. Since you really need to go to his site to see how he made his tag, I'll just share what I did different. None of us had the Noel die. The letters I used are from one of Tim's grungeboard sets but I still used glue and glitter. The Santa is from Tim's seasonal stash paper pack. I covered it with Distress Rock Candy Stickles after matting him. The music note banner paper is also from the seasonal stash. I cut a strip about 3/4 of an inch and distress it and folded it and cut the dovetail ends. I also used some perfect pearl mist on the flourish and holly leaves. Thanks for stopping by. If you don't have Tim bookmarked already just click here for Day 1.

Wednesday, November 30, 2011

Almost Here!

Today I went to the movies with my sister June and saw Arthur Christmas. We had a grand time. Tonight I followed Mario on twitter #12Tags and Mario Rossi facebook for BTS or Behind The Scenes for Tim's 12 Tags on my android phone, while watching Zombieland with my husband then Revenge with Valerie. I even saw my son Allen for a few minutes. It's been a pretty eventful day.

I'm getting ready for Tim's 12 Tags which will premier at 12 midnight Mountain time. Mario's BTS has already shown Tim's Pine Cone die and Martha Stewart Glitter. I'll be fast asleep by the time Tim posts to his blog since I'm on the east coast. But I'll be up early in the morning to see that gorgeous tag and I think there is going to be a video. Then I'll be off to Archiver's to meet with some friends and we'll have a Tim day making tags. I'm excited to say the least.

One last thought and shout out to NaBloPoMo. This final day in November marks a milestone for me. I have posted every day this month and I have enjoyed it. It wasn't that hard. NaBloPoMo sent me a email inviting me to join them next month and post every day in December but I think I'll keep it an annual thing. But I will post more than I have been before this challenge started. I enjoy creating things and posting them. I found some challenges I really enjoy participating in. I have some followers now and even tell my friends now that I have a blog. I am starting to make new friends online. I've added some features to my blog such as labels with a word cloud and finally figured out how to get a decent shot with my camera without having to go outside. This is a good thing because with Winter coming it's going to get cold. Yes even here in Georgia it gets cold in the winter and occasionally we even have snow.

So if you're following my blog I want to say thanks. If you visit from time to time I still want to say thanks AND if you leave a comment Thank you very much!

Tuesday, November 29, 2011

Stars and Stamps Sketch Challenge # 97

These are for the weekly card sketch challenge at Stars and Stamps. Yesterday I posted a Red Shimmer card and the other cards I had put together but not finished. I finished the other shimmer cards the same way I did the first one but wanted to do something different for the pink cards.

Notice the white panel?
Originally I thought I would stamp an image to color where the white panel was but the balance was off. I quickly realized that while the white panel worked for the shimmer cards, it was not working with these bold pastels.  I decided to replace it with another panel of pink dotted paper to balance the one in the lower right corner. The paper is from a Anna Griffin Margot Carkstock pack that I have had for some time. I used Vintage Photo direct to paper lightly on the edges of each rectangle and the front of the card. The white scallop oval is a McGill punch and the stamp is Autumn Leaves AL3381 "Between The Lines". I use Archival Jet Black ink from Ranger. I colored the image with Staedtler Watercolor pencils and a Dove Blender. The edges of the scallop are inked with Vintage Photo Distress Inks and my blending tool.

Stars and Stamps Sketch Challenge # 97
So now I have a total of 16 cards I have made for Operation Write Home. 12 of these are Love theme. I have until December 10th to send in Love theme cards for the Archway + OWH Special Mission. They will match up to 5000 Love theme cards with packs of cookies to send to our Troops. So if you hadn't already heard about this mission, now you know why I have been making Love cards when everyone else is making Christmas cards. I'm going to go ahead and send these off to Operation Write Home for the Archway Cookies promotion.


Monday, November 28, 2011

Sending Love

Ranger's Seafoam White Embossing Powder and Hero Arts CG145 Reversed Flowers and Leaves
This is for the weekly card sketch challenge at Stars and Stamps. I like the simplicity. I put together 7 card  quickly using the sketch and I learned something. Do my stamping before I put my cards together. I thought since they were in panels I could just cut out all my panels and put them together quickly and then do my stamping and coloring. Unfortunately when I started stamping I started running into problems. Only this card is completed and I basically had to take it apart fix the areas that didn't stamp well and put it back together on a new base.

Stars and Stamps Sketch Challenge # 97
For this version of the card, I used Ruby Red shimmer paper for the base then cut the panels from shimmer paper in Gold and Silver and stamped them with the Hero Arts CG145 Reversed Flowers and Leaves background stamp using VersaMark ink and embossed with Ranger's Seafoam White embossing powder. I then stamped "sending LOVE your way" and the hearts with the blue ink from the  Archival Brillance Peacock ink pad from Tsukineko on Iced White paper.  The stamps are from Hero Arts. The background stamp is CG145 Reversed Flowers and Leaves, the message and a heart from Trees, Birds and messages CL 182, more hearts from Share Laughter CL 151 & one tiny heart from Sending Happy CL 305. I love how you can mix and match the Hero Art sets.


More to do!
Three of the other cards are with shimmer paper in the same colors but different combinations and 3 are pink with Yellow, Orange and Pink paper with a dot pattern. I'll probably do the all the shimmer cards like this but may do something different with the pastels. I hope to finish the up tomorrow and ship them off to Operation Write Home. I don't want to miss the Archway Cookies deadline.


Sunday, November 27, 2011

Clean and Simple

Clean and Simple
I kept seeing CAS on several blogs. Finally I found a tutorial on OWH that explained what it meant. Clean and Simple. I was intrigued and wanted to give it a try. I had this piece of  teal acetate in my stash and it was large enough to fold and trim for a standard card. I picked a ribbon to go with it and went from there. I folded a piece of white card stock and made a liner to go inside the card. It is just tied in with the ribbon. Then I picked out my set of Hero Arts hearts stamps. I stamped them on the white card stock with Archival Jet Black ink. Getting them lined up with the circles on the acetate was not as easy as I thought because they are individual wood blocks stamps. I even used my light box to lightly sketch the circles on the cardstock. I didn't want them to be perfectly centered or even in the exact same location inside the circle but close. I used watercolor pencils and a Dove Blender to color the hearts. I also stamped one Heart on the inside on the upper left hand corner.

I had to pull out my 2006 Hero Arts Catalog to find the info on this stamp set. I had them displayed on a shelf on my wall and didn't realize the blocks were not marked, just the box which I no longer have. They are LL 989 Heart Messages - Stencil Print (reg). The acetate is Mod Circles HO636 from Hambly Studios.

I think it qualifies for Clean and Simple, but I'm not sure. What do you think?

Saturday, November 26, 2011

I Love Grungy Monday 28

Alcohol Inks and Embossed Foil
Grungy Monday 28 at Studio L3 is a wonderful challenge to use Alcohol Inks and Foil Embossing using Tim Holtz fantastic Fall Pumpkin as inspiration. You can find Tim's Pumpkin here on his blog. He has a wonderful tutorial telling you exactly how he created his pumpkin. You can find Linda Ledbetter's beautiful Tim inspired milk carton gift box and the challenge for this week here.

You may recognize my butterfly from earlier in the week when I created it and posted it on my blog. I made my butterfly by covering  one of Tim's grungeboard butterflies with the foil and running it through my Big Shot with the Regal Flourishes embossing folder. Then I dripped on alcohol inks letting them dry between colors and although you can't see it here direct to foil Archival jet black ink on the raised areas. It really accents the alcohol inks. The body of the butterfly is a stick pen from Making Memories also covered in alcohol ink and the wings are connected with wire and tiny attacher staples. One thing you couldn't see before are the butterfly's antennae. They are light weight wire that is wrapped tightly around the wire ring at the top of the stick pin with the ends sticking out on each end to form the antennae. The light blue flower behind them helps to show them off.

Today I finished my project by covering the frame with the Inkssentials adhesive foil and embossing it with the Damask embossing folder from the same set. I already had this Chipboard Frame from a Making Memories kit. I used the alcohol inks and Archival Jet Black Ink per Tim's instructions.

The flowers are Grungeboard die cut from Tim's Tattered Floral Die. I used Rock Candy Distress Stickles and Distress Stains with a technique I learned from Tim when he was guest instructor in Jennifer McGuire's Inspiration Showcase class. The stickpin butterfly is pushed through the foam dots used to layer the flower with the big pearl.

The picture in the frame is one of my favorites of a trip I took with my daughter Valerie to the Chattanooga Aquarium in 2007. They have a wonderful Aquarium and a beautiful Butterfly Garden. I will always think of their Butterfly Garden when I think of Chattanooga.

Thanks for stopping by and taking a look. Be sure to leave a comment if you have time. Now I'm going to go and check out the other entries posted on Linda's blog. So far there are 23, but the challenge is open until tomorrow, Sunday November 27th at 8pm MDT. I really enjoy Linda's Grungy Mondays Challenge.

Friday, November 25, 2011

Circle Heart

Following a Kristina Werner Design Sketch
I first learned of Kristina Werner when I took a Jennifer McGuire online class. It was Inspiration Showcase class. I learned a lot from the class. It motivated me to get back into the studio creating and it introduced me to Kristina Werner.

Kristina had 3 really cute card sketches for the class that I really liked so I decided to check out her blog. Kristina had just started her Holiday Card Series 2011 on November 8th. For 25 days she posted a new card and a video showing her creating the card, using a variety of supplies. I loved the cards and I loved the videos. I have been hooked ever since.

The card I've posted today is following one of her Holiday Card Series 2011 designs. Kristina's card used Basic Grey Nordic Holiday. Following her design, I was easily able to use Basic Grey Sweet Threads to create a "Love" Card to send off with my box of cards for Operation Write Home.

I enjoyed Kristina's cards so much I decided to purchase the Virtual Card Class for Holiday Card Series 2011. For a mere $5 I was able to purchase a pdf file complete with beautiful pictures of all the cards, a supply list and direct links to each card post and videos. Now it is quick and easy to find any card in the series when I need a quick idea. Just like I did today. Kristina's card is gorgeous. If you want to take a look check it out here.

Thanks for stopping by.

Ruby

Thursday, November 24, 2011

Happy Thanksgiving!

With all the Turkey projects circulating on the web I want to share one too.

Notice that the burlap background, painting on fabric and sewing techniques used here. All trendy in scrapbooking today. Except this is a project my daughter Valerie did in 1989 when she was 5 years old. I'm sure kindergarteners around the country are still painting their little hands and fingers to make Happy Turkeys for Thanksgiving.

I hope you all have had a Very Happy Thanksgiving!

Wednesday, November 23, 2011

Archway Cookies

"Love is All Around"
Archway Cookies is sending cookies to our troops. Check out this link if you want to know why.

Distress inks are Worn Lipstick and Barn Door. The lighter cardstock is cream. Stamp set is " Love is All Around"  from Impressive Obsessions. If you want to know why I am making Love cards then you need to check out why Archway Cookies is sending cookies to our troops. (See the link above) This is card is also going in my box to send to Operation Write Home. I think I may make multiples of this one. It is based loosely on this weeks sketch.

Tuesday, November 22, 2011

Tim's Pumpkin, My Butterfly

Ranger challenged their Artists to alter a craft store pumpkin. Tim altered his using Inkssentials adhesive backed foil and alcohol inks. His pumpkin is absolutely amazing. You can see it on his blog here. I advise you to click on the link to his blog because it has a step by step tutorial and once you've finished checking out his pumpkin you can check out the Quirky Turkeys he made from Rosettes along with a step by step tutorial and video on how to make the rosettes and then go to his next post to see beautiful shimmery fall leaves he's created using glassine paper with alcohol inks and metallic mixatives. The man is a genius.
What you see here is a butterfly I made from one of his grungeboard butterflies covered with the foil and running it through my Big Shot with the Regal Flourishes embossing folder. Then I dripped on alcohol inks letting them dry between colors and although you can't see it here direct to foil Archival jet black ink on the raised areas. It really accents the alcohol inks. The body of the butterfly is a stick pen from Making Memories also covered in alcohol ink and everything is connected with wire and tiny attacher staples. I'm thinking about entering it in the Grungy Monday challenge this week at Studio L3 because this is the Tim Holtz technique she is challenging us to try. She has a fantastic prize this week so I want to work on this a little more before I enter it and get a better picture too. Wish me luck! You know you still have time to work on a project if you want to enter one. In case you do I'll wish you luck!

Monday, November 21, 2011

Stars and Stamps Challenge 96

Sending Happy Thoughts
Even though I didn't finish this card last night, it was a fun and quick card to work on. The reason is that I started with a sketch and used a stamped image I had in my stash that I had already water colored.

This beautiful stamp is from Anna Griffin's 2005 Rose Collection 580156 by All Night Media. I love the fine delicate lines and found it perfect for water colors pencils and a aqua brush. I sometimes will stamp images and take them with me to crops when I don't have a particular project I'm working on. That way I can still join my friends and have something to work on. When I saw the sketch this week I pulled out my image and picked some papers to go with it and did a little cut, paste and layering. The "sending happy thoughts" is a Hero Arts cling stamp that came in a special little set that I had received at a special crop at Archiver's a few years ago. I just carefully cut the lines of sentiment on the stamp apart so I could space them out in a line and stamp them. I used VersaMark and Zing White embossing powder, then tore the paper to make the little strips. The pattern paper is Sweet Threads from Basic Grey. I've used a little Broken China Distress inks to blend the edges of the card and tone down the bright green of the base card.

The sketch is from this weeks Operation Write Home Stars and Stamps sketch challenge.  I have a tendency to closely follow sketches. I probably need to loosen up a little bit. But that is the thing about sketches. It's up to you. You can either follow them closely, use them as a starting point and deviate madly or anything in between. Now that my card is finished I'll post it to the challenge page and check out what the other participants have done. If you want to play along with me click here for the details.

I'm pleased with how my card turned out and it will go in my collection to send to Operation Write Home. They will send my cards along with many others to our troops serving far away from home so our troops will have handmade cards to use when writing home to their friends and family. If you want to know more check out their website at:  http://operationwritehome.org/

Sunday, November 20, 2011

Stars and Stamps Weekly Sketch Challenge

This is the sketch for Stars and Stamps which has a weekly challenge to help inspire those who want to make cards for Operation Write Home. I've been working on a card but it's late and I have to be at work early tomorrow so you'll have to check back tomorrow evening to see what I come up with. If you want to play along with me click here for the details.

The link for Operation Write Home is here.

Saturday, November 19, 2011

Perfect Pearl Mini Misters - Grungy Monday 27

Linda at Studio L3 picked out quite a challenge for us this week. We have the opportunity to make our own Perfect Pearl Mists and play. Using distress reinkers and a technique Tim Holtz shares with us at the Twelve Tags 2007~Day 6 . I love this technique, but I really need a lot more practice. If you want to see Linda's lovely scene complete with deer along with the other works submitted for this challenge, check out her blog at Studio L3: Grungy Monday 27 

You can also see how Tim Holtz makes the Perfect Pearl Distress Ink mist here along with his 2008 March technique challenge tag.

My mist combinations are:
Walnut Stain and Perfect Cooper
Broken China and Perfect Pearl
Shabby Shutters and Perfect Gold

I wish you could see the shimmer but it is hard to capture on camera. You'll either have to take my word for it or mix up your own batch and try it for yourself.

Thanks for stopping by.


Friday, November 18, 2011

Think Pink

 I wanted to make a card for a friend who just had surgery for breast cancer. She is just beginning her treatment and I wanted to let her know I was thinking of her. I wanted to make her something pink and I wanted to use my Anna Griffin paper. This is a paper I fell in love with when I first started to scrapbook. It is a beautiful paper line, full of elegant floral motifs. It is peaceful and serene. I wanted to share that with my friend. She is a very brave and courageous woman. She is strong and beautiful. I know she will beat this.


Thursday, November 17, 2011

Water Color Finger Paints

Water color finger paints with Distress Inks and Perfect Pearls ~ Still Shimmery once they dry!
Just a quick post to share a link to a cool video from Shari Carroll at the Hero Arts Blog. It is a sneak peak video showing the new Paris Newspaper stamp coming out soon and a really cool technique using Distress Inks and Perfect Pearls in a mister. Her card is gorgeous. If you haven't seen it yet, you don't want to miss it.
Check out the video here.

Ranger makes the Perfect Pearl mist already mixed up but I already had some Perfect Pearl on hand, so I mixed up my own Perfect Pearl mist and played around with it a little bit. I stamped my Hero Arts Big Owl stamp with VersaMark on water color paper and heat embossed with Gold Sand Embossing Powder. The cards are already dry here, but I spritzed a little Distress Ink on my craft mat until it beaded up so you could really see the shimmer.What a fun way to get inky fingers.

Wednesday, November 16, 2011

Golden Sand

Big Owl Embossed with Golden Sand Embossing Powder
Today I worked on another card using my favorite Hero Arts stamp (Big Owl) along with my favorite inks (Tim Holtz distress inks).

The embossing powder is by Stampendous and is called Golden Sand. It is a creamy color with brown and gold flecks. I had been wanting to try it with this stamp and maybe do a snowy owl, but once I started playing with the distress inks I just had too add more colors! I've used Vintage Photo, Faded Jean, Chipped Sapphire, Shabby Shutters and Worn Lipstick. Big Owl did look a little strange with his white eyes so I took a brown Slick Writer and colored in the pupils and the feet.

I had finished my owl and was going through my paper stash looking for paper I could use to make my card when I ran across an old favorite from SEI called Mini Memories. When I first started scrapbooking I made a small album using this paper line. I loved the colors and the geometric patterns. So many different variations. A collector's dream. I had a small bag with several sheets of paper and the alphabet stickers left.

After a little playing around with different combinations of paper and layout options, I settled on this one. To help the letters stand out, I outlined the stickers with a dotted line using a brown Zig Millennium marker. These are great fiber tip pens and made adding the dotted line simple and quick.

There are so many beautiful paper lines out now all with wonderful embellishments to make coordinating elements so easy. I really love being able to mix up things I already have on hand and having it come out so well. One more card for Operation Write Home!

Tuesday, November 15, 2011

HOO-RAY

Who Loves You!
This just posted on the Hero Arts Blog:
"The random winner from all of the cards created for Operation Write Home and submitted to our Flickr Group is RubyLou! RubyLou, you’ll be receiving the new Hero Arts-Operation Write Home stamps just as soon as they’re released."
In celebration I have made a card with my favorite Hero Arts Owl to send with my Operation Write Home Cards!
I decide to add a little speech balloon at the top. Who (heart) You? is stamped with Hero Arts fanciful swirl alphabet CL141 


Monday, November 14, 2011

Brightly Blinged

A few days ago I posted a card with a big shiny red ornament. I had created the ornament using a technique using grungeboard, pewter distress crackle paint and alcohol inks. You can see how Tim does it here. It is a technique I learned from Tim Holtz's 12 Tags of Christmas. Well, there were 3 other smaller ornaments in the seasonal pack and I painted then colored them all at the same time. Turned out I only need one for the first card. So when I started to work tonight I already had my embellishments. I added some Stampendous Class A Peel  stickers to the ornaments and adhered them to some shimmer white card stock. I silver embossed the stamp "Bright Border" from Hero Arts on some Blackberry shimmer cardstock and added the Sparkly teal fluffy twine.

Sunday, November 13, 2011

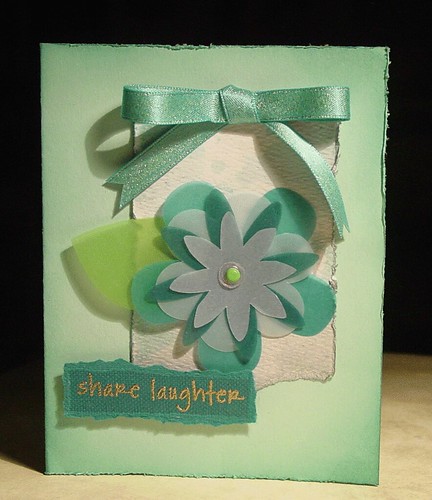
Share Laughter

OWH-teal-share-laughter


This card is for a Sketch Challenge 95 at Stars and Stamps. They are the blog for Operation Write Home. The sketch was designed by Peggy.

I used Iced Spruce and Evergreen Bough Distress Inks, smashing the ink pad side by side on a craft sheet, and misting with water until the ink beads up and swiping white water color paper through the ink. You can let it dry or heat set, then swipe some more until you get the effect you want.
Peggy's Sketch
If you've never watch Tim Holtz's really quick but technique packed video on Distress Inks you can check it out here.

The vellum flowers are pre-cut from Fiskars. Share Laughter is Gold Embossed. The stamp is from a Hero Arts set of the same name, CL151. The ribbon has little specks of gold woven in.

Saturday, November 12, 2011

One more for the Hop

Well it has been a busy 2 days. The Family History Expo was in town. I went with my daughter, Valerie, again this year. Lots of great Genealogy classes and vendors and bloggers. Check out Valerie's blog Begin with Craft, for all the details.

The other thing that kept me busy this weekend was the "Operation Write Home" Blog Hop. There were 11 companies who participated in the Hop. They asked their artist to design cards to show their support for the troops. You would think only 11 blogs would not take that long to visit, but there were multiple cards at each site. SRM had 21 beautiful cards, Copic had a technique I've never seen before and Ranger had cards by 8 different artist and one of them was my hero, Tim Holtz. Some of these blogs I had never been to before but all of them had something that wowed me.

This is a card I made to send to Operation Write Home. I designed it as a tri-fold card. I used Hero Arts "Dot Flourish" CL285 stamp set. I stamped the front of the card and the first inside flap and white embossed them. Then used Worn Lipstick Distress Ink to stamp a border on the inside but left it mostly white to allow more room to write home. The pattern paper is Basic Grey "Perhaps" for base and Bittersweet" for Heart, which is die cut with "Heart Wings" Tim Holtz Alterations from Sizzix. Border punch from Martha Stewart.

These are the fine companies who participated this weekend to inspire us to create cards for the troops and make us aware of Operation Write Home.
  1. Hero Arts
  2. Sizzix
  3. Tombow
  4. Prima
  5. Ranger
  6. Studio Calico
  7. Tonic Studios
  8. Basic Grey
  9. Copic Marker
  10. SRM Stickers
  11. May Arts
To go to the beginning of the Blog Hop click here.

Friday, November 11, 2011

Operation Write Home Blog Hop

Today has been a very busy day which is why I am posting so late. I wanted to make sure you all knew about the Operation Write Home Blog Hop. If you haven't heard of Operation Write Home this is a great way to find out about them and see some great ideas for some cards. If you love to make cards and support our troops this is a great site to find out how you can create and donate cards to be sent to our troops so they can use the cards to write home.

I've created this card to send in to Operation Write Home. I'll be making some more too. It's too late to donate Christmas cards for this season, but they are asking for Valentine Day Cards, Thinking of You or Missing You themes.

Since we can't use glitter on cards for the troops I used Gold embossing powder and applied it to the distressed inked edges of the hearts and lower edge of card to give it a little shine and texture. I also used Picket Fence Distress stain to tone down colors in background pattern paper and card stock so the hearts would stand out more. The pattern paper is Basic Grey Bittersweet. The gold embossed hearts were stamped along the bottom with HeroArts stamp F 3798 "Wavy Hearts". The the large solid hearts in the center are from the Tim Holtz Alterations Sizzix Die Cut "Heart Wings". The scallop circle  are a Quickutz die, I believe it is called "stacking flowers". I also used the Fiskars Treading water border punch and pleated the paper. I used Antique Linen Distress Ink to distress the edges.

Thursday, November 10, 2011

Not so Quick Card

It's actually a pretty quick card except for the drying time. I designed this card using techniques I learned from Tim Holtz 12 tags of Christmas. The red ornament is a grungeboard piece from Tim's seasonal set. A few days ago I generously coated it with Pewter Distress Crackle Paint and left it to dry to a beautiful crackled but glossy finish.  Today I applied Red Pepper Alcohol ink. I placed a few drops on the ornament and used the felt applicator to get even coverage and then dropped some more on which quickly spread out to cover all of the ornament. By allowing it to spread out on it's own it dried to a very glossy finish. Alcohol inks dries very quickly. I only colored the circle part of the ornament. You can still see the pewter color on the ornament hanger.

The clear ornament on top of the red one is a round Fragment that I sanded to get a frosty look and then used clear embossing powder to emboss the snowflakes on it. I drilled a small hole near the top and trimmed off the grungboard bow and tied a ribbon bow.
Then I glue dotted the ribbon to the red ornament allowing the frosted fragment to swing freely.
close up of sanded fragment with clear embossing

I stamped the pine bough from Santa's Wish CMS 032 from Stampers Annymous Tim Holtz collection in Evergreen Bough Seasonal Distress Ink repeatedly on white cardstock.. The Merry Christmas is silver embossed from Hero Arts AR147 Merry Christmas which is a Clearly Archiver's by Hero Arts set from a few years back. After rounding the corners I added it to the front of a card I had covered with some Christmas paper from my stash.

Wednesday, November 9, 2011

12 Tags of Christmas

If I haven't mentioned it before, Tim Holtz is my Hero! I love his style and his products are the best! He has an excellent blog and updates it frequently. I never know what I might find. He may post about a new product along with excellent projects with all the details on how he made it . He may feature one of his latest adventures, a class he's teaching or just to wish us a Happy Holiday, whatever the current one is! He is always warm and friendly. He reads all of his comments even though he can't answer them all. He loves to hear from us so to encourage us to leave a comment, from time to time, he will have an excellent give a way. Just for leaving a comment! (Some of us are very shy) I enjoy visiting his blog. It is my favorite.

Since 2007 Tim Holtz has been posting the 12 Tags of Christmas. Every morning from December 1st to December 12th I wake up earlier than I thought possible and stumble to the computer. It's just like when I was a little girl and knew that Santa had come and just had to see what he left for me! Then it was by the glow of the Christmas tree lights that I discovered amazing treasures. Now it's by the glow of the computer screen, since I usually am not awake enough to find the light switch. I ooooh and aaaaah as I look at his amazing creations, slowly scrolling through all the pictures and then go back an read the instructions to see how he does his magic.  I always have to leave a comment too!  That's because every night Tim is busy creating a tag, but Mario makes sure all the people who left a comment are added to the randomizer for a chance to win a prize. It's like making it onto the "Nice" list.
All colors are from Distress Embossing Powder - 2007

The card you see here is inspired by the tag Tim made for Day 3 of 2007 12 Tags of Christmas. He used an amazing technique with different colors of Distress Embossing Powder. You can see the original post with his tag and all the details here. I won the drawing from the names of people who made comments that day. Tim and Mario sent me the "Santa's Wish" stamp set along with a few other items. I used them and the Distress Embossing Powder technique to make my Christmas card that year. That year Tim also signed the tag he created that day and included it in my prize box. I was so excited. I still am.

I hope Tim does 12 Tags again this year. It is too much fun for me!


Tuesday, November 8, 2011

A Challenge! Too Much Fun! Grungy Monday 26

Santa's Wishing You A Merry Christmas

Yes! I have completed my Tag for Studio L3 Grungy Monday 26 challenge for this week. I was very excited when I saw Linda had selected one of Tim Holtz's 12 Tags of Christmas for the challenge. We didn't have to make a Christmas Tag. Just create a project using the techniques of that post. But I love Christmas so I pulled out my Christmas stamps and got started. Here is my tag.

The materials used for this Tag were: Tim Holtz Idea-ology clear mask; Picket Fence Paint Dabber; Peeled Paint, Antique Linen, Iced Spruce, Evergreen Bough, Festive Berries Distress Inks; Archival Jet Black Ink; Gold Embossing Powder; Peeled Paint Distress Stickles; Candy Cane Stickles; a little strip of German Paper and miscellaneous ribbon. My "Santa" and "Merry Christmas" stamps are from the "Santa's Wish CMS 032" set and the "Long Tall Pine Trees" behind Santa's head are from the "Reindeer Flight CMS 052" stamp set. Both from Stamper's Anonymous Tim Holtz Collection.

If you want to check out the inspiration for my tag check out Tim's tag from Day 7 of  The Twelve Tags of Christmas 2009 click here. Tim explains all the techniques and has pictures detailing each step. I cut more pieces for my mask since the stamp I used has more details and used different colors (The Winter Seasonal Inks are new) but otherwise I pretty much just followed his instructions for the techniques.

You still have time to create a project for Grungy Monday. To get the details go to Linda's blog by clicking here. While you're there check out her wonderful tag and all the other projects that the other talented artist are posting. The challenge ends this Sunday, November 13, 80pm MDT.


One last thing. I was visiting Tim's blog today and He was really excited to share a link to Tammy Tutterow's blog. So of course I had to check it out. Tammy has Tuesday Tutorials and shared a really cool technique using Rock Candy Distress Crackle Paint and Dry Embossing. I took a look and I think it Rocks! She calls it Frosty De-boss. Check it out here.

Monday, November 7, 2011

Grundy Monday 25

Roy and Betty Albea
Linda's Grungy Monday 25 Challenge last week made me think. The challenge:  "Use your favorite Tim Holtz products to create a loving tribute to a friend, relative or inspiring person who's passed away." I thought all week long about my parents. I miss them so much because I love them so much. I thought about their life, how much they loved each other and how much they loved their children, grandchildren and yes even great-grandchildren.

detail of film strip ribbon
I also thought a lot about the page I wanted to make for them. I thought about the photos I would use and while I worked on other things I thought about what products I would use. I thought about it so much I didn't finish in time. I finally finished it up this morning. It was a joy to work on this challenge. I find that working on a memorial page to someone that has been taken away brings them closer to me and instead of dwelling on my loss, I can remember the wonderful times I had with them.

Once the crackle dries use distress inks
Here is a list of Tim's products I used: Grungepaper and Grungeboard. Picket Fence, Fired Brick and Worn Lipstick Crackle Paint. Idea-ology Filmstrip Ribbon. Tim Holtz Sizzix Alterations Die Heart Wings. Distress Inks Iced Spruce (from the winter seasonal distress ink set) on the wings. Also used Worn Lipstick, Vintage Photo, Walnut Stain and Antique Linen Distress Inks and the Flourish mask on the background. Rock Candy Distress Stickles. Glossy Accents.All paper except the velum is the Valentine theme paper from Tim's Seasonal Paper pack.The little bits of pink ribbon is from my stash.

I love Tim Holtz's products. I also love to watch him demo them. To see Tim's Videos on Crackle Paint, Distress Inks and more click here. To visit his blog click here.

I hope you visit Linda's Grungy Monday 25 Challenge and see some of the wonderful tributes the other ladies did. They are beautiful. While you're there, check out her current challenge. This week, Grungy Monday 26, the challenge is to used techniques from a tag Linda selected from one of Tim's 12 Tags of Christmas. I love Tim's 12 Tags and would love to tell you all about it but I'm saving that for another post. I've got to get busy. I'm not going to miss this week's challenge. It is going to be too much fun!

Sunday, November 6, 2011

Color Change


This is a twist on another card I posted earlier for the Hero Arts Bling-It challenge. If you want to see the first card it is here. I originally designed this card with silver and gold embossing powder on silver and gold paper. I loved the way it turned out but wondered what it would look like in Red and Green. I did end up making a few changes. I didn't use the holly and berry stamp for the side borders. Instead I used some pattern paper. I did use the same Christmas tree. This time I stamped it with shabby shutters distress ink and colored over it with Berol Prisma color pencils. I like the way I can blend the colors easily. I  used Red Green and White gem stones in various sizes.I used the same Fiskars punches for the edge of the card front. I love these punches.. This card will go in with the ones I send for the Cards that Care drive. All cards need to be sent by November 31st.

Saturday, November 5, 2011

Just a few minutes before the day is over. I have been playing with my new seasonal distress inks! I love these colors. Festive Berries, Evergreen Bough and Iced Spruce. I've just finished my first card with these yummy colors. The snowman is from the Seasonal Grungeboard set and painted with Picket Fence crackle paint and then distressed with the Iced Spruce Distress Ink. Then I used a little Black Soot, Brushed Corduroy Stains and Spiced Marmalade distress ink. I think Mr. Snowman may need a little red scarf? Maybe a little holly on his hat? What do you think?

Friday, November 4, 2011

Cards that Care

There is a blog hop starting today to help promote a card drive to make Christmas cards for elderly that live in nursing homes. Vera Yates and Jennifer McGuire are sponsoring the drive. If you love to make Christmas cards this is a wonderful way to make cards that will be sent to people in nursing homes and add a little holiday cheer to their Christmas season. Vera explains it all so well, so if you want all the details for the card drive go here
If you've never been on a blog hop before, it starts with a post that tells you about the hop and gives you a link to the next stop. Sometimes you are visiting someone's blog and find out the are  a participant in a blog hop. You become intrigued and want to follow the hop from the start, so they also have a link to where you can start from the beginning. Be sure to leave a comment to let them know you stopped by. Sometimes they have a drawing from all the comments for a prize. One way to explain a blog hop is that it's like a blog tour. Sort of like a tour of homes that is so popular during the Holidays. Usually you're seeing blogs you have never seen before (at least one or two) and many times they are supporting a good cause.
The Cards that Care hop has many blog stops and each will be posting a handmade Christmas card. It's a good way to see a wide variety of cards and techniques. I am looking forward to spending my spare time this weekend visiting the many sites, working on Christmas Cards for the drive and working. Yes, I am working every day this weekend, but I don't want to miss this.  If you want to go on the blog hop start here.

Thursday, November 3, 2011

Hero Arts


Silver and Gold
 The Hero Arts Blog  has daily posts of beautiful cards along with instructions. They have a great team of artist who take turns hosting the blog each week. Every day is different but my favorite day to check out their blog is Wednesday. Titled "Watch it Wednesday"  you can watch a video showing how they make the card they are featuring that day. These videos load fast and they are loaded with great techniques.

They also have bi-monthly contests. There are 3 categories you can enter each month. Just create a card using at least one Hero Arts stamp and upload it to Flicker. Add it to the Hero Arts  group with the designated tag for that contest. It's that simple.

The categories for  November are: (1) Holiday Tags and Gift Wrap, (2) Bling It Up! and (3) Color Challenge - Pink, Pool, Green, Neutral and White. Entries are due November 10th for the first round and November 27 for the second round.

When I saw the Bling It Up! category I started thinking about my favorite Christmas show when I was growing up. "Rudolph the Red Nosed Reindeer".  The forest animals decorate the trees with silver and gold and those decorations "bling" as the snowman sings "Silver and Gold". I still love listening to Burl Ives sing "Silver and Gold".

It sounds like a fun category and I'm sure there will be plenty of entries. I tried my hand at it and this is what I came up with. Silver and Gold with lots of bling. I've used silver and gold embossing powder on silver and gold shimmer paper and of course added 2 different size gem stones for the holly berries and Christmas decorations on the tree, with a larger gemstone for the star on top. I also used a gold leaf pen to fill in the open leaves on the tree. All the stamps are Hero Arts cling stamps from seasons past . Very Blingy!
Related Posts Plugin for WordPress, Blogger...